So you’re ready to take your home security to the next level with a wireless security camera system, huh? Well, you’ve come to the right place! In this guide, we’ll show you step-by-step how to install a wireless security camera system at home. Yep, you heard that right, you can do it yourself! No need to hire a professional or spend a fortune. Let’s dive in and get started!
Nowadays, having a security camera system is like having a superhero guarding your home 24/7. Whether you want to keep an eye on your front porch, backyard, or even your fluffy pet, a wireless security camera system is the way to go. And the best part? It’s super simple to install!
We get it, the thought of installing a security camera system may seem a bit intimidating at first, but trust us, it’s not rocket science. With a few basic tools, a little bit of patience, and our expert guidance, you’ll have your wireless security camera system up and running in no time. So grab your tool belt and get ready to become your own DIY superhero!
How to Install a Wireless Security Camera System at Home?
Here are some easy steps to do this,
- Start by determining the best location for your camera.
- Ensure a stable internet connection for uninterrupted surveillance.
- Mount the camera securely using screws or adhesive for outdoor or indoor installation.
- Connect the camera to a power source.
- Download the camera app on your smartphone and follow the setup instructions.
- Configure the camera’s settings, such as motion detection and notifications.
- Test the camera to ensure it’s working properly.
Follow these steps to successfully install your wireless security camera system at home!
Choosing the Right Camera System for Your Needs
Before diving into the installation process, it’s crucial to choose the right camera system for your needs. There are various factors to consider, such as the number of cameras, resolution, viewing angle, infrared capabilities, and whether you want indoor or outdoor cameras. Research different models and read customer reviews to ensure you find a system that meets your requirements.
Additionally, consider whether you want a self-monitoring system or one that offers professional monitoring services. Self-monitoring allows you to view the camera feed through a smartphone app, while professional monitoring involves a third-party company that monitors your cameras and alerts you of any suspicious activities.
Once you have chosen the right camera system, you can proceed with the installation process.
Gathering the Necessary Tools and Equipment
Before starting the installation, gather all the necessary tools and equipment to ensure a smooth and hassle-free process. The tools you may need include a screwdriver, drill, screws, a ladder or step stool (if installing outdoor cameras), cable clips, and a power source.
Make sure you have all the essential equipment provided with the camera system, such as the cameras, cables, DVR/NVR (Digital Video Recorder or Network Video Recorder), and power adapters. Familiarize yourself with each component before proceeding with the installation.
It’s also recommended to read the instruction manual or watch tutorial videos provided by the manufacturer to understand the installation process thoroughly.
Determining the Camera Placement
The next step is to determine the optimal placement for your cameras. Start by identifying the areas you want to monitor, such as entry points, driveways, or backyards. Consider the camera’s field of view and make sure it covers the desired areas.
For outdoor cameras, ensure they are installed at a height that prevents tampering or vandalism. Place them in a way that allows the camera to capture the entire area without any blind spots. Indoor cameras should be strategically positioned to cover specific rooms or areas within your home.
Keep in mind the Wi-Fi coverage range and ensure that all cameras have a stable connection to the Wi-Fi network.
Mounting and Installing the Cameras
Now comes the actual installation process. Start by mounting the cameras according to the placements you determined earlier. Use the appropriate screws and a drill to secure them in place. Ensure that the cameras are properly aligned and leveled for optimal viewing.
If your camera system requires wiring, carefully run the cables along the walls or ceilings, ensuring they are hidden and protected. Use cable clips to secure the wires and prevent any accidents or damage.
For wireless camera systems, the installation process is relatively easier, as you won’t have to deal with cables and wires. Simply place the cameras in their designated spots and make sure they have a strong Wi-Fi signal.
Connecting the Cameras to the DVR/NVR and Power Source
Once the cameras are securely mounted, it’s time to connect them to the DVR/NVR and power source. Follow the instructions provided by the manufacturer to properly connect the cameras to the main recording unit.
For wired systems, connect the cables from each camera to the corresponding ports on the DVR/NVR. Ensure that the connections are secure to avoid any signal loss or disruption.
For wireless systems, pair the cameras with the DVR/NVR using the provided instructions. This is usually done through a smartphone app or a web interface. Once the cameras are successfully connected, they should start transmitting the video feed to the recording unit.
Testing the Camera System
After completing the installation and connection process, it’s essential to test the camera system to ensure everything is functioning correctly. Check the live video feed from each camera to verify that the images are clear and stable.
Make any necessary adjustments to the camera angles or settings to improve the visibility and coverage. Test the night vision capabilities of the cameras to ensure they provide a clear view in low-light conditions.
Additionally, configure the settings of your smartphone app or the DVR/NVR to receive notifications and alerts in case of any suspicious activities.
Monitoring and Maintaining Your Camera System
Once your wireless security camera system is installed and functioning correctly, you can start monitoring and maintaining it regularly. Check the camera feed periodically to ensure it’s capturing the desired areas and that there are no technical issues.
Clean the cameras and lenses regularly to prevent dust or dirt from affecting the image quality. Keep an eye on any firmware updates released by the manufacturer and install them to ensure your system remains up to date with the latest security features.
If you face any technical issues or require assistance, refer to the user manual or contact the manufacturer’s customer support for guidance.
Safety Tips for Installing a Wireless Security Camera System at Home
When installing a wireless security camera system at home, it’s essential to prioritize safety and take necessary precautions. Here are some safety tips to keep in mind:
1. Use Proper Safety Equipment
Wear safety goggles, gloves, and closed-toe shoes while working on the installation. This will protect you from any potential injuries or accidents.
2. Turn Off Power Sources
Before beginning the installation process, turn off the power sources in the areas where you’ll be working. This will prevent any electrical shocks or accidents.
3. Secure Ladders and Step Stools
If you’re using a ladder or step stool to reach higher areas for installation, ensure they are stable and securely placed. Avoid leaning too far or reaching beyond your arm’s reach to prevent falls or injuries.
4. Follow Safety Guidelines
Adhere to all safety guidelines provided by the camera system manufacturer. This includes handling and installing the equipment properly and using recommended tools and techniques.
5. Protect and Secure Wires
When installing wired camera systems, protect and secure the wires to prevent tripping hazards and damage. Avoid running wires across walkways or areas with heavy foot traffic.
6. Seek Professional Help if Needed
If you’re unsure about any aspect of the installation process or face technical difficulties, it’s better to seek professional help. They have the expertise and experience to install the system correctly and ensure optimal functionality.
7. Familiarize Yourself with Security Laws
Before installing a security camera system, familiarize yourself with the local laws and regulations regarding home surveillance. Ensure your installation complies with the privacy laws in your area.
Benefits of Installing a Wireless Security Camera System
Installing a wireless security camera system at home offers several benefits:
1. Enhanced Security
A wireless security camera system acts as a deterrent against potential burglars and intruders. It allows you to monitor your property and keep an eye on any suspicious activities, enhancing the overall security of your home.
2. Remote Monitoring
With wireless camera systems, you can monitor your home anywhere and anytime through a smartphone app or web interface. This provides peace of mind, especially when you’re away from home.
3. Easy Installation
Wireless camera systems are easy to install without the need for complex wiring or cables. This makes it a convenient and DIY-friendly option for homeowners.
4. Flexibility and Scalability
Wireless camera systems offer flexibility in terms of camera placement and the ability to expand the system as needed. You can easily add more cameras to cover additional areas of your home.
5. High-Quality Video Feed
Modern wireless camera systems provide high-resolution video feeds, ensuring clear and detailed images. This can be crucial in identifying potential threats or suspicious activities.
6. Motion Detection and Alerts
Many wireless camera systems come equipped with motion detection capabilities. They can send real-time alerts to your smartphone or email when any unusual activity is detected.
7. Evidence Collection
In the unfortunate event of a break-in or unwanted incident, a wireless camera system can provide valuable evidence for investigations and insurance claims.
Tips for Maintaining Your Wireless Security Camera System
Maintaining your wireless security camera system is essential to ensure optimal performance and longevity. Here are some tips to help you keep your system in top shape:
1. Regularly Clean the Cameras and Lenses
Dust or dirt on the cameras or lenses can affect the image quality. Regularly clean them using a soft, lint-free cloth to remove any build-up.
2. Update Firmware and Software
Stay up to date with firmware and software updates released by the manufacturer. This ensures that your system remains equipped with the latest security features and fixes any potential vulnerabilities.
3. Test the System Periodically
Perform routine tests to ensure that all cameras are functioning correctly and the video feed is clear. Check for any blind spots or areas that may require readjustment.
4. Replace Batteries in Wireless Cameras
If your wireless cameras use batteries, monitor their battery life and replace them when necessary. This will prevent any disruption in the camera’s functionality.
5. Secure Wi-Fi Network
Ensure that your Wi-Fi network is secure by using strong passwords and encryption methods. This prevents unauthorized access to your camera system and protects your privacy.
6. Review Recordings Regularly
Take the time to review the recorded footage regularly. This can help you identify any potential security threats or suspicious activities that may have gone unnoticed.
Installing a wireless security camera system at home is a practical and effective way to enhance your home’s security. By following the steps outlined in this article, you can successfully install a wireless camera system and enjoy the benefits it offers.
Remember to prioritize safety during the installation process, familiarize yourself with the camera system’s features, and regularly maintain the system to ensure its optimal performance.
Frequently Asked Questions
Welcome to our Frequently Asked Questions section on how to install a wireless security camera system at home. Whether you’re looking to boost your home security or simply want to keep an eye on your property, installing a wireless security camera system can provide peace of mind. In this section, we’ll address some common questions to help you get started with your installation process.
1. What are the basic components needed for installing a wireless security camera system at home?
To install a wireless security camera system at home, you’ll need a few essential components. These include wireless cameras, a video recorder or network video recorder (NVR), power adapters, cables, and, in some cases, a wireless router.
The cameras transmit video wirelessly to the recorder or NVR, which stores the footage for future viewing. Power adapters supply electricity to the cameras, while cables connect the cameras to the recorder or NVR. The router may be necessary if you want to access your camera feed remotely.
Before purchasing your components, it’s important to determine the number of cameras you need, the specific features you want (such as night vision or motion detection), and any other requirements unique to your home setup.
2. How do I choose the ideal location for installing my wireless security cameras?
Choosing the ideal location for your wireless security cameras is crucial for optimum performance. Start by surveying the areas you want to monitor and identify potential blind spots. These could be areas obstructed by trees, buildings, or other structures. Install the cameras at strategic positions that cover these areas while ensuring a clear and unobstructed view.
It’s also important to consider the range of your wireless cameras. Make sure they are within range of your wireless router to ensure a strong signal.
It’s a good idea to mount the cameras at least 9 feet above the ground to deter vandalism and tampering.
3. How do I install the wireless security cameras?
When installing wireless security cameras, start by reading the manufacturer’s instructions carefully. Each camera may have specific installation requirements. In general, the installation process involves mounting the cameras, connecting them to the power supply, and syncing them with the recorder or NVR.
Begin by attaching the mounting brackets to ceilings, walls, or other surfaces as recommended by the manufacturer. Then, secure the cameras onto the brackets. Next, connect the power adapters to the cameras and plug them into a power source.
Finally, follow the instructions to pair the cameras with the recorder or NVR wirelessly. Test each camera to ensure it’s functioning properly before finalizing the installation.
4. How can I ensure a stable wireless connection for my security camera system?
To ensure a stable wireless connection for your security camera system, there are a few steps you can take. Firstly, make sure your wireless router is placed in a central location, away from obstructions, to maximize coverage. Also, ensure that your cameras are within range of the router, as the signal strength diminishes over distance.
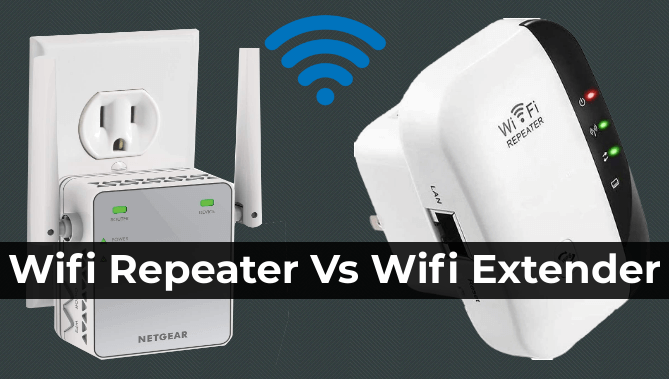
If you’re experiencing connectivity issues, try adjusting the position of your router or using wireless range extenders to increase coverage. Additionally, reducing interference from other devices can help improve your wireless connection. Keep your cameras away from sources of interference such as cordless phones, Wi-Fi-enabled devices, and microwave ovens.
5. How can I access and view the footage from my wireless security camera system?
To access and view the footage from your wireless security camera system, you have a few options. Many systems come with their own mobile apps or software that allow you to remotely access and view the camera feed on your smartphone, tablet, or computer. Simply download the app or software, follow the setup instructions, and connect to your system.
You may also have the option to access the footage directly from the recorder or NVR. Some recorders have HDMI or VGA outputs that allow you to connect them directly to a monitor or TV for viewing. Alternatively, you can remove the hard drive from the recorder and connect it to a computer or laptop to view the recorded footage.


