In today’s digital landscape, virtual communication tools like Google Meet have become indispensable for work, education, and social interactions. While these platforms offer a plethora of features to make our virtual lives easier, some of us still find certain functionalities, like screen sharing, a bit daunting. But fret not! This guide is your one-stop solution for mastering the art of screen sharing on Google Meet. Imagine the convenience of effortlessly presenting a project, conducting an online class, or even sharing a laugh over a video—all during a Google Meet call. The ability to share your screen can significantly elevate your virtual interactions, whether you’re a professional, a teacher, or simply someone looking to share something interesting. This guide aims to simplify the screen-sharing process, offering step-by-step instructions and handy tips to ensure you make the most of this game-changing feature. So gear up to enhance your virtual communication skills and become a screen-sharing maven with Google Meet!
- Open Google Meet and join a meeting.
- Click on the three-dot menu in the bottom right corner.
- Select “Present now” and choose the screen you want to share.
- Click “Share” to start sharing your screen.
How to Share Screen on Google Meet
Google Meet is a powerful tool for online meetings and collaboration. One of its key features is the ability to share your screen with other participants. This can be incredibly useful for presenting slideshows, demonstrating software, or working on projects together. In this article, we will guide you through the step-by-step process of sharing your screen on Google Meet.
Step 1: Start or Join a Google Meet Meeting
The first step to sharing your screen on Google Meet is to either start a new meeting or join an existing one. If you are starting a new meeting, simply click on “New Meeting” in Google Meet and share the meeting link with the participants. If you are joining an existing meeting, click on the meeting link provided to you.
Once you are in the meeting, make sure your microphone and camera are enabled, as you will need them during the screen-sharing process. You can enable them by clicking on the microphone and camera icons at the bottom of the screen.
Step 2: Click on the “Present Now” Button
Now that you are in the meeting, locate the bottom toolbar and click on the “Present now” button. This button is represented by a square with an arrow pointing upwards. When you click on it, a menu will appear with different screen-sharing options.
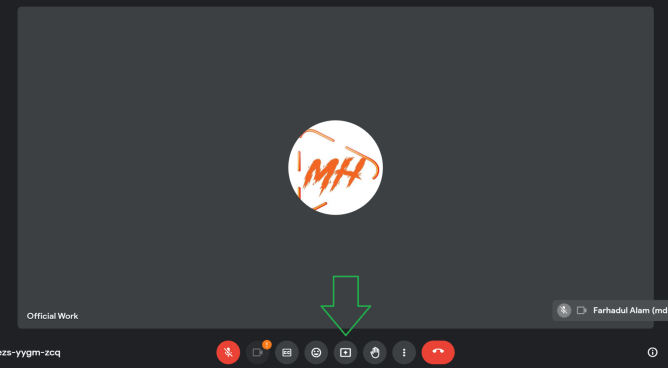
From the menu, select “Your entire screen” to share your entire desktop or “A window” to share a specific window or application. Choose the option that suits your needs, and click on “Share” to start sharing your screen.
Step 3: Navigate and Interact with Your Shared Screen
Once you start sharing your screen, Google Meet will automatically switch to the screen-sharing mode. You will notice a red border around the shared screen, indicating that it is being shown to the participants. You can now navigate and interact with your shared screen as you normally would.
During the screen-sharing session, you can switch between different windows or applications by clicking on them. You can also use the toolbar at the top of the screen to pause or stop screen sharing, annotate on the screen, or give control to another participant.
Step 4: Stop Sharing Your Screen
When you are ready to stop sharing your screen, simply click on the “Stop sharing” button at the bottom of the screen. This button is represented by a square with an arrow pointing downwards. Once you click on it, your screen-sharing session will end, and you will return to the regular meeting view.
It’s important to note that only the meeting host and presenters have the ability to share their screen on Google Meet. Participants who are not designated as hosts or presenters will not have the option to share their screens.
Step 5: End the Meeting
After you have finished sharing your screen and completed your meeting, it’s time to end the session. To do this, simply click on the red “Leave” button at the top-right corner of the screen. A confirmation dialog will appear, asking you to confirm that you want to leave the meeting. Click on “Leave Meeting” to end the session.
That’s it! You have now successfully learned how to share your screen on Google Meet. Whether you are presenting, collaborating, or teaching, screen sharing can greatly enhance your online meetings and make them more interactive and productive.
Frequently Asked Questions
Here are some commonly asked questions about how to share screens on Google Meet.
Question 1: How can I share my screen during a Google Meet session?
To share your screen during a Google Meet session, follow these steps:
1. Join the Google Meet session and ensure that your camera and microphone are turned on.
2. Once you’re in the meeting, click on the “Present now” button located at the bottom right corner of the screen.
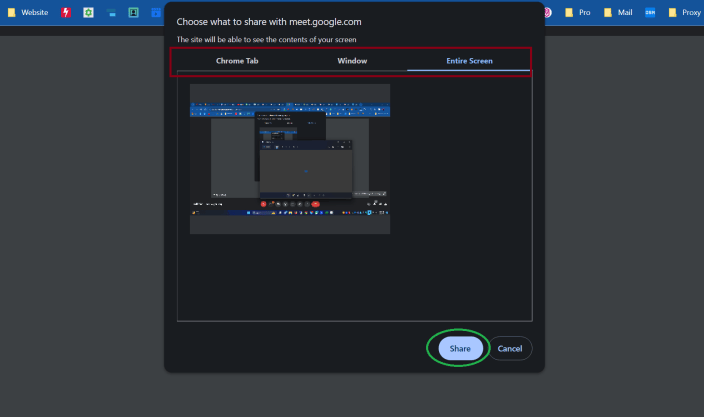
3. A pop-up will appear with the option to share your entire screen, a specific window, or a Chrome tab. Select the desired option based on what you want to share.
4. Click on the “Share” button to start sharing your screen. Other participants in the meeting will now be able to see what you’re sharing.
Question 2: Can I control what others see when I share my screen on Google Meet?
Yes, you have the option to control what others see when you share your screen on Google Meet. When you click on the “Present now” button, you can choose to share your entire screen, a specific window, or a Chrome tab.
By selecting a specific window or Chrome tab, you can limit what others see to only the content within that window or tab. This gives you more control over the information you share and allows you to keep other content on your screen private.
Question 3: Can I share audio along with my screen on Google Meet?
Yes, you can share audio along with your screen on Google Meet. When you click on the “Present now” button, you’ll see an option to share your screen. Below that, there is a checkbox that says “Share audio.” Make sure this checkbox is selected before clicking on the “Share” button.
By sharing audio, participants in the meeting will be able to hear any sound that is playing on your computer while they’re sharing their screen. This is useful when you want to share a video or audio clip and want others to hear the sound as well.
Question 4: Can I share my screen on Google Meet using a mobile device?
Yes, you can share your screen on Google Meet using a mobile device. To do this, follow these steps:
1. Open the Google Meet app on your mobile device and join the meeting.
2. Once you’re in the meeting, tap on the three dots icon located at the bottom right corner of the screen.
3. From the menu that appears, select the “Present screen” option.
4. You’ll be prompted to allow Google Meet to capture your screen. Tap on “Start now” to proceed.
5. Your screen will now be shared with the other participants in the meeting.
Question 5: Can I share my screen on Google Meet without joining the meeting?
No, you cannot share your screen on Google Meet without joining the meeting. Screen sharing is a feature that is only available to participants who are actively in a meeting. You need to join the meeting first before you can share your screen with others.
If you want to test screen sharing or set up your screen before joining a meeting, you can create a practice meeting with yourself or with a few colleagues to ensure everything is working as expected.
In conclusion, mastering the art of screen sharing on Google Meet can greatly enhance your online collaboration experience. Whether you are conducting a virtual meeting, giving a presentation, or providing remote support, being able to share your screen effortlessly can make a significant difference in engaging your audience and conveying your message effectively.
By following the simple steps outlined in this guide, you can confidently navigate the screen-sharing feature on Google Meet. Remember to check your settings, choose the appropriate screen or window to share, and utilize the various options available to enhance your presentation. With practice and familiarity, you will soon become a pro at sharing your screen, allowing you to engage your audience in a more interactive and dynamic way. So, take advantage of this powerful tool and elevate your online meetings to new heights of productivity and collaboration.