Welcome to a step-by-step guide on how to configure Gitlab Freeipa authentication! If you’ve been wondering how to integrate these two powerful tools, you’re in the right place. Picture this: seamless authentication between Gitlab and Freeipa, enabling smooth access control and user management. Sounds cool, right? Well, let’s dive in and learn how to make it happen!
In this tutorial, we’ll explore the process of configuring Gitlab Freeipa authentication and unleash the potential of this combination. By the end, you’ll have a solid understanding of how to set up the integration and enjoy the benefits it offers. So, grab your gear and let’s embark on this exciting journey together!
Ready to explore the world of Gitlab Freeipa authentication? Join us as we uncover the ins and outs of this powerful integration. Whether you’re a newbie or a seasoned pro, this guide has got you covered. So, buckle up and get ready to take your authentication game to the next level!
2. Set up GitLab.
3. Configure GitLab for FreeIPA Authentication.
4. Test the FreeIPA Authentication Integration.
5. Enable SSO with FreeIPA Credentials.Follow this comprehensive guide to configure GitLab with FreeIPA authentication seamlessly and enhance your security and user management capabilities. By integrating FreeIPA with GitLab, you can streamline authentication processes and provide a secure environment for your users. Get started now!
How to Configure Gitlab Freeipa Authentication: A Comprehensive Guide
Gitlab is a popular source code management tool that allows teams to collaborate on projects effectively. FreeIPA, on the other hand, is an open-source identity management system that provides centralized authentication and authorization. Integrating Gitlab with FreeIPA allows for a seamless authentication experience for users. In this article, we will explore the step-by-step process of configuring Gitlab FreeIPA authentication and the benefits it brings to your development workflow.
Understanding Gitlab FreeIPA Authentication
Gitlab FreeIPA authentication is a method that enables users to log in to Gitlab using their FreeIPA credentials. FreeIPA acts as a single sign-on solution, simplifying user management and access control. By integrating Gitlab with FreeIPA, organizations can leverage their existing user database, eliminate user duplication, and enforce consistent security policies.
To configure Gitlab FreeIPA authentication, follow these steps:
1. Install and configure FreeIPA: Begin by setting up a FreeIPA server in your environment. Ensure it is properly configured with the required user accounts and groups.
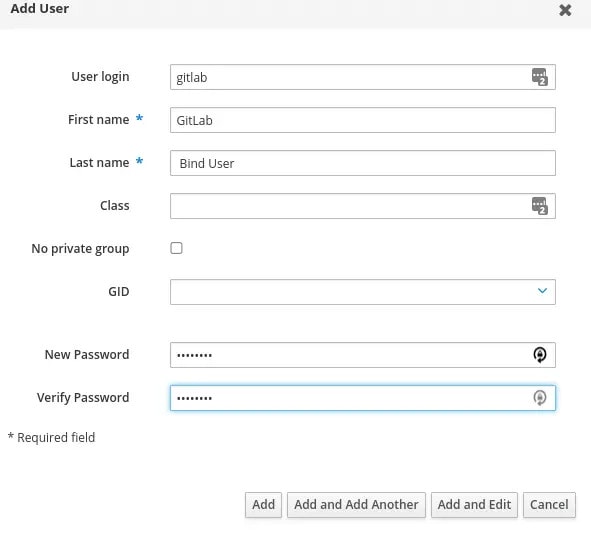
2. Configure Gitlab LDAP settings: In the Gitlab configuration file, add the necessary settings to establish a connection with FreeIPA’s LDAP server. Specify the LDAP user filter, bind DN, and bind password.
3. Test the LDAP connection: Test the LDAP connection from Gitlab to FreeIPA to ensure successful communication. This step helps in troubleshooting any potential issues before proceeding further.
4. Configure Gitlab FreeIPA OAuth2: Enable the FreeIPA OAuth2 provider in Gitlab by updating the configuration file. Provide the appropriate details such as the client ID and secret obtained from FreeIPA.
5. Enable FreeIPA as an authentication method: In Gitlab, navigate to the “Admin Area” and go to the “LDAP Settings” page. Enable the FreeIPA authentication method by checking the corresponding checkbox.
6. Test FreeIPA authentication: Verify that FreeIPA authentication is working correctly by attempting to log in to Gitlab using a FreeIPA user account.
Benefits of Configuring Gitlab FreeIPA Authentication
Configuring Gitlab FreeIPA authentication offers several benefits for organizations:
1. Centralized user management: By integrating with FreeIPA, organizations can manage user accounts, groups, and access control policies from a single centralized location. This eliminates the need for duplicate user accounts across different systems.
2. Enhanced security: FreeIPA provides robust authentication and authorization capabilities, allowing organizations to enforce strong password policies and implement multi-factor authentication. This helps in ensuring that only authorized users can access Gitlab.
3. Streamlined workflows: With FreeIPA authentication, users can seamlessly log in to Gitlab using their existing FreeIPA credentials. This eliminates the need for users to remember and manage separate login credentials, simplifying the authentication process and improving productivity.
4. Improved auditing and compliance: By integrating Gitlab with FreeIPA, organizations can leverage FreeIPA’s auditing and logging capabilities to track user actions and ensure compliance with regulatory requirements. This helps in maintaining accountability and mitigating security risks.
Configuring LDAP Integration with Gitlab
(Introduction: In this section, we will discuss how to configure the LDAP integration with Gitlab. LDAP integration allows organizations to authenticate users against an LDAP server and manage user access to Gitlab. Follow the steps below to configure LDAP authentication in Gitlab.)
Step 1: Install and configure an LDAP server
To enable LDAP integration with Gitlab, you first need to set up an LDAP server. This can be either an OpenLDAP server or an Active Directory server, depending on your organization’s requirements. Install and configure the LDAP server according to the documentation specific to your chosen server.
Step 2: Configure LDAP settings in Gitlab
Once the LDAP server is set up, you can configure Gitlab to communicate with it. In the Gitlab configuration file (usually located at /etc/gitlab/gitlab.rb), find the external LDAP settings section and update the relevant fields. Here are some key settings you’ll need to configure:
– `gitlab_rails[‘ldap_enabled’] = true`: Enable LDAP integration in Gitlab.
– `gitlab_rails[‘ldap_servers’]`: Define the LDAP server(s) you want to connect to. Specify the server host, port, encryption, and base DN.
– `gitlab_rails[‘ldap_bind_dn’]` and `gitlab_rails[‘ldap_password’]`: Provide the LDAP server bind DN and password for Gitlab to authenticate against the LDAP server.
You can also configure additional settings such as user filter, group base, and attributes mappings to customize the LDAP integration further.
Step 3: Test and verify LDAP integration
After configuring the LDAP settings, it’s essential to test the LDAP integration to ensure everything is functioning correctly. Use the Gitlab command-line tool to perform a test connection to the LDAP server:
“`
sudo gitlab-rake gitlab:ldap:check
“`
This command will check the LDAP connection and display any errors or warnings encountered. It’s crucial to resolve any issues before proceeding further.
Using LDAP Groups for Access Control
One of the significant advantages of LDAP integration is the ability to manage access control through LDAP groups. By associating LDAP groups with Gitlab projects, you can control which LDAP users have access to specific repositories. Follow these steps to utilize LDAP groups for access control:
1. Create LDAP groups: In your LDAP server, create groups that align with your desired access control structure. For example, you could have groups like “Developers,” “QA Team,” or “Project Managers.”
2. Configure LDAP group sync: In Gitlab’s LDAP settings, enable LDAP group sync to automatically import LDAP groups into Gitlab. Configure the group sync options, such as the group filter and membership.
3. Associate LDAP groups with projects: In Gitlab, navigate to a project’s settings and go to the “LDAP Group Links” tab. Assign the relevant LDAP groups to the project to grant access to those group members.
4. Test LDAP group access: Verify the LDAP group access control by logging in to Gitlab using an LDAP user account. Ensure that the appropriate access permissions are applied to the user based on their LDAP group membership.
Troubleshooting LDAP Integration
Sometimes, issues may arise when configuring LDAP integration with Gitlab. Here are a few common troubleshooting steps:
1. Check LDAP server connectivity: Ensure that Gitlab can establish a network connection with the LDAP server. Validate the server address, port, and firewall settings.
2. Verify LDAP bind credentials: Double-check the LDAP bind DN and password configured in Gitlab. Ensure that they are correct and have the necessary permissions to perform LDAP searches.
3. Review LDAP attribute mappings: Check the attribute mappings in Gitlab’s LDAP settings, such as username, email, and display name. Make sure they correspond to the LDAP server’s attribute schema.
4. Examine LDAP server logs: Review the logs generated by the LDAP server for any error messages or warnings. These logs can provide valuable insights into the cause of LDAP integration issues.
Securing Gitlab with FreeIPA SSO
(Introduction: In this section, we will explore how to enhance the security of Gitlab by implementing FreeIPA Single Sign-On (SSO). By enabling FreeIPA SSO, users can log in to Gitlab using their FreeIPA credentials. Follow the steps below to secure your Gitlab instance with FreeIPA SSO.)
Step 1: Configure FreeIPA server
Before enabling FreeIPA SSO in Gitlab, you need to configure your FreeIPA server to enable SSO capabilities. Make sure you have a FreeIPA server up and running, and your users are enrolled in the FreeIPA realm.
Step 2: Generate the Gitlab client certificate
To establish trust between Gitlab and FreeIPA, you’ll need to generate a client certificate for Gitlab. This certificate allows Gitlab to authenticate against the FreeIPA server. Here’s how to generate the certificate:
1. On the Gitlab server, generate a private key:
“`
openssl genrsa -out gitlab.key 2048
“`
2. Create a certificate signing request (CSR) using the private key:
“`
openssl req -new -key gitlab.key -out gitlab.csr
“`
3. Submit the CSR to the FreeIPA server for signing. The signed certificate will be returned by the FreeIPA server.
4. Install the signed certificate on the Gitlab server.
Step 3: Enable FreeIPA SSO in Gitlab
Once the Gitlab client certificate is installed, you can enable FreeIPA SSO in Gitlab by updating the Gitlab configuration file. Set the following options:
– `gitlab_rails[‘omniauth_enabled’] = true`: Enable OmniAuth in Gitlab.
– `gitlab_rails[‘omniauth_allow_single_sign_on’] = true`: Allow single sign-on (SSO) with FreeIPA.
– `gitlab_rails[‘omniauth_block_auto_created_users’] = false`: Allow Gitlab to create user accounts for authenticated FreeIPA users.
Step 4: Test FreeIPA SSO
To test FreeIPA SSO, log out of Gitlab and attempt to log in again using your FreeIPA credentials. If everything is configured correctly, you should be able to log in to Gitlab without providing additional authentication.
Securing Gitlab with FreeIPA Two-Factor Authentication
Enabling FreeIPA SSO provides an additional layer of security for Gitlab. However, organizations may wish to enhance security further by implementing FreeIPA two-factor authentication (2FA). Follow these steps to enable FreeIPA 2FA in Gitlab:
1. Configure FreeIPA 2FA settings: Enable two-factor authentication in your FreeIPA server and configure the authentication mechanisms you wish to use (e.g., SMS, OTP).
2. Enable FreeIPA 2FA in Gitlab: In Gitlab’s OmniAuth settings, enable FreeIPA two-factor authentication. Set `gitlab_rails[‘omniauth_required_group’]` to restrict 2FA to specific Gitlab groups, if desired.
3. Test FreeIPA 2FA: Log out of Gitlab and attempt to log in again using a FreeIPA user account that has 2FA enabled. The user should be prompted to provide the additional authentication factor.
By following these steps, organizations can secure their Gitlab instances using FreeIPA SSO and two-factor authentication, providing robust protection for their source code repositories.
Wrap-Up:
Configuring Gitlab FreeIPA authentication allows organizations to streamline user management, enhance security, and improve productivity. By integrating Gitlab with FreeIPA, organizations can leverage centralized identity management, eliminate duplicate user accounts, and enforce strong access control policies. Additionally, LDAP integration and FreeIPA’s single sign-on capabilities further enhance the authentication experience for users. By following the step-by-step instructions outlined in this guide, organizations can successfully set up and configure Gitlab FreeIPA authentication, unlocking the numerous benefits it offers.
Key Takeaways: How To Configure Gitlab Freeipa Authentication
- Gitlab can be integrated with FreeIPA for user authentication.
- FreeIPA is an open-source identity management solution.
- Configuring Gitlab FreeIPA authentication involves updating the Gitlab configuration file.
- Users need to set up a service account in Gitlab and FreeIPA to establish the connection.
- Proper configuration allows Gitlab users to authenticate using their FreeIPA credentials.
Frequently Asked Questions
Welcome to our FAQ section on configuring Gitlab with Freeipa authentication! Below, you’ll find answers to some common questions related to this topic. Whether you’re new to Gitlab or Freeipa, or just need some help with the authentication setup, we’ve got you covered!
1. How do I configure Gitlab to use Freeipa authentication?
To configure Gitlab to use Freeipa authentication, you need to follow a few steps. First, you’ll need to make sure that you have a Gitlab instance set up and running. Then, you’ll need to install and configure the Gitlab LDAP integration by modifying the Gitlab configuration file. In this file, you’ll specify the connection details to your Freeipa server, including the LDAP server address, base DN, and bind credentials. After saving the changes and restarting Gitlab, you should be able to authenticate Gitlab users using Freeipa credentials.
Keep in mind that configuring Gitlab to use Freeipa authentication requires administrative access to the Gitlab instance and knowledge of the Freeipa server details. If you’re not familiar with these topics, it’s recommended to consult with your system administrator or IT department for assistance.
2. Can I use Gitlab with Freeipa for single sign-on (SSO)?
Yes, you can use Gitlab with Freeipa for single sign-on (SSO) by integrating Gitlab with an identity provider (IdP) that supports the SAML 2.0 protocol. Freeipa can act as an IdP and provide SSO capabilities to Gitlab. To enable SSO between Gitlab and Freeipa, you’ll need to configure Freeipa as a SAML IdP and Gitlab as a SAML service provider (SP). This involves setting up trust between the two systems, exchanging metadata, and configuring the necessary mappings and attributes.
Once the SSO integration is in place, users can authenticate to Gitlab using their Freeipa credentials, and they won’t need to re-enter their username and password when accessing other services that are also integrated with Freeipa for SSO.
3. What are the benefits of using Freeipa authentication in Gitlab?
Using Freeipa authentication in Gitlab offers several benefits. Firstly, it provides centralized authentication, allowing you to manage user access and credentials from a single point of control. This simplifies user management and enhances security by ensuring consistent authentication across your software development ecosystem.
In addition, Freeipa authentication in Gitlab enables you to leverage existing user accounts and roles defined in Freeipa. This means that you can easily grant or revoke access to Gitlab based on the user’s role or group membership in Freeipa, streamlining user provisioning and access management.
4. Can I use Gitlab with Freeipa if I already have a different authentication method configured?
Yes, you can use Gitlab with Freeipa even if you already have a different authentication method configured. Gitlab supports multiple authentication mechanisms simultaneously, allowing you to offer different login options to your users. You can configure both the existing authentication method and Freeipa authentication in Gitlab to coexist, providing flexibility and accommodating different user preferences.
It’s important to note that when using multiple authentication methods, you may need to consider potential conflicts in username or email address collisions. Gitlab provides options for username aliases or email-based authentication to address these conflicts, ensuring a smooth login experience for all users.
5. How can I troubleshoot issues with Gitlab and Freeipa authentication?
If you’re experiencing issues with Gitlab and Freeipa authentication, there are several troubleshooting steps you can take. First, double-check the configuration settings in the Gitlab configuration file related to Freeipa authentication, including the LDAP server address, base DN, and bind credentials. Make sure they are accurate and properly formatted.
Additionally, check the logs in Gitlab for any error messages or warnings related to authentication. These logs can provide valuable insights into the underlying issue. If you’re still unable to resolve the problem, it’s recommended to consult the Gitlab documentation or seek assistance from the Gitlab community or support channels. They can help you diagnose and troubleshoot specific issues related to Gitlab and Freeipa authentication.
Summary
Setting up GitLab with FreeIPA authentication can help keep your code secure and manage user access easily. By integrating FreeIPA, you can ensure that only authorized users can access your GitLab instance, improving overall security.
To configure this, you need to install and configure the necessary packages, generate and distribute SSL certificates, and modify the GitLab configuration files. Once everything is set up, users can authenticate with their FreeIPA credentials and begin collaborating on projects in GitLab.
By following these steps, you can empower your team to work together more efficiently while keeping your code repositories safe and protected. Remember to document and test the configuration thoroughly to avoid any issues and enjoy the benefits of FreeIPA authentication in GitLab.