Welcome! Are you wondering how to run diagnostics on your Dell laptop? You’ve come to the right place! Whether you’re a tech-savvy enthusiast or simply looking to solve a pesky issue, we’ve got you covered.
Picture this: your laptop is acting up, and you’re not sure where to start. Don’t worry – we’ll guide you through the process step by step, making it as easy as pie. With a few simple clicks, you’ll be able to diagnose and troubleshoot any problems that your Dell laptop may be experiencing.
No more scratching your head in confusion or feeling overwhelmed. We’re here to empower you with the knowledge and skills to tackle diagnostics like a pro. So, grab your laptop, and let’s embark on this exciting journey together!
How to Run Diagnostics on Dell Laptop?
Running diagnostics on your Dell laptop is a simple process that can help identify and resolve hardware or software issues. Follow these steps:
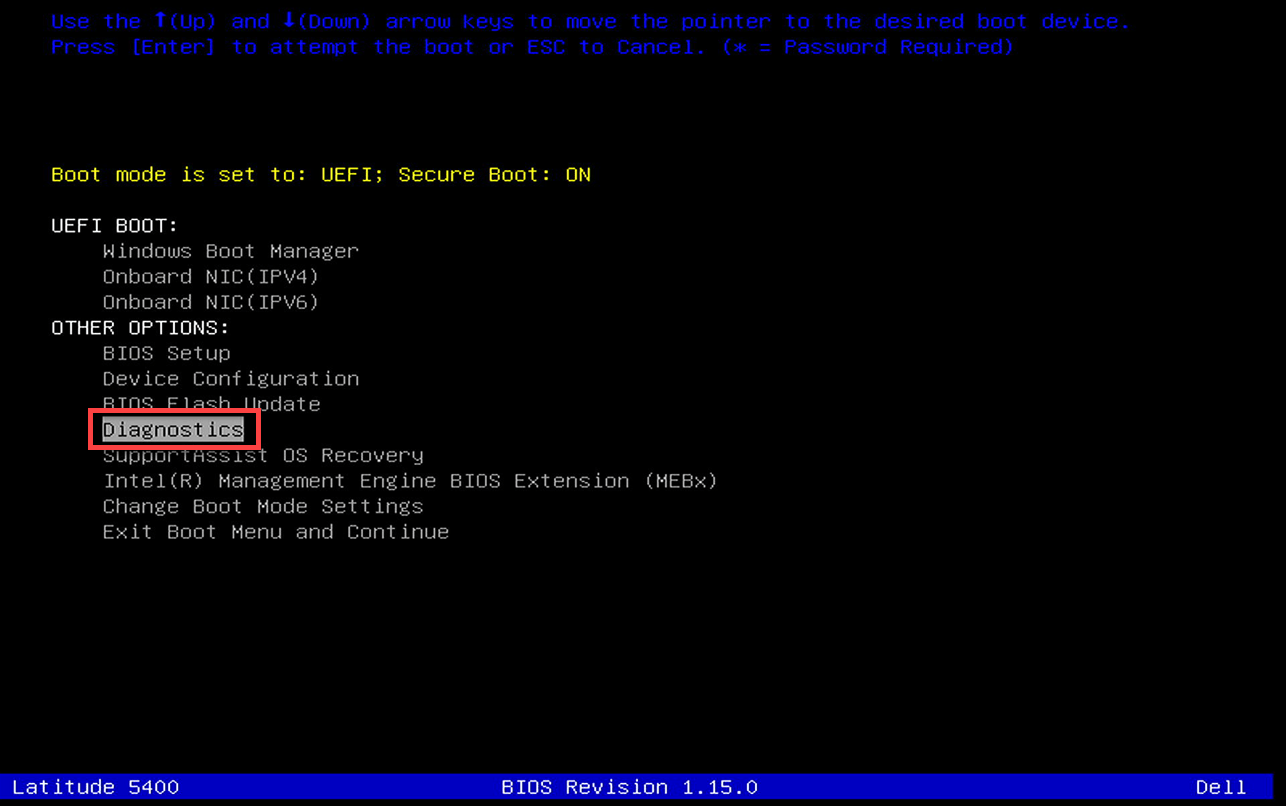
- Power on your laptop and press the F12 key repeatedly.
- Select “Diagnostics” from the boot menu.
- Wait for the diagnostic scan to complete.
- Note down any error codes or messages.
- Visit Dell’s support website and enter the error codes for further assistance.
Why Run Diagnostics on Your Dell Laptop?
Running diagnostics on your Dell laptop offers several benefits. Firstly, it helps identify any hardware failures or software conflicts that may be causing performance issues. By isolating the problem, you can focus on finding the appropriate solution. Secondly, running diagnostics can extend the lifespan of your laptop by identifying potential issues early on, allowing you to take preventive measures. Lastly, diagnostics can provide valuable information for Dell technical support, should you need to contact them for assistance.
Methods for Running Diagnostics on Dell Laptops
There are multiple ways to run diagnostics on your Dell laptop, depending on the model and the software available. Here, we’ll explore three of the most common methods to help you get started.
Method 1: Using Dell SupportAssist
Dell laptops often come with pre-installed diagnostic tools, such as Dell SupportAssist. To access this tool, follow these steps:
1. Ensure your laptop is powered on and connected to the internet.
2. Open the Start menu and search for “Dell SupportAssist” or locate the program in the list of installed applications.
3. Launch Dell SupportAssist and wait for it to load.
4. Once loaded, click on the “Checkup” or “Diagnostics” tab.
5. Follow the on-screen instructions to run a full system scan and diagnose any issues.
Dell SupportAssist will scan your laptop’s hardware and software components, providing a detailed report on any problems found. It will also offer possible solutions or recommendations for resolving the identified issues.
Benefits of Using Dell SupportAssist:
– It’s a built-in tool specifically designed for Dell laptops.
– It provides a comprehensive scan of your laptop’s hardware and software.
– It offers step-by-step guidance for troubleshooting and resolving issues.
Method 2: Using the Dell Diagnostic Tools
If your Dell laptop does not have SupportAssist installed or if you prefer a more specialized diagnostic tool, you can use the Dell Diagnostic Tools. These tools are available for download from the Dell website and can be run independently. Here’s how to use them:
1. Visit the Dell website and navigate to the “Support” or “Drivers & Downloads” section.
2. Enter your laptop’s model or service tag to locate the relevant drivers and downloads.
3. Look for the “Diagnostic” or “Diagnostics” category and download the appropriate tool for your laptop.
4. Install the diagnostic tool by following the on-screen instructions.
5. Launch the tool and select the type of diagnostics you want to perform (e.g., quick test, thorough test, specific component test).
6. Follow the prompts to complete the diagnostic process.
The Dell Diagnostic Tools provide more advanced options for diagnosing specific components or conducting in-depth scans. They offer a detailed analysis of your laptop’s hardware and can help identify even the most complex issues.
Benefits of Using the Dell Diagnostic Tools:
– It allows for more specialized and targeted diagnostics.
– It provides advanced options for analyzing specific components.
– It offers comprehensive reports and recommendations based on the scan results.
Method 3: Using Built-in Windows Diagnostics
If you prefer a more generic approach or don’t have access to Dell-specific diagnostic tools, you can utilize the built-in diagnostic tools in Windows. These tools can help identify software-related issues and can be accessed as follows:
1. Press the Windows key + R on your keyboard to open the Run dialog box.
2. Type “msinfo32” and press Enter.
3. The System Information window will open. Click on the “Components” category in the left pane.
4. Expand the “Problem Devices” or “Conflicts/Sharing” section to view any issues.
5. Take note of any listed devices with conflicts or problems and research potential solutions online.
While the built-in Windows diagnostics may not provide as comprehensive an analysis as Dell-specific tools, they can still offer valuable insights into potential software-related issues.
Benefits of Using Built-in Windows Diagnostics:
– It’s available on any Windows laptop, regardless of the manufacturer.
– It can help identify software conflicts or compatibility issues.
– It provides a starting point for troubleshooting before seeking more specialized tools.
Tips for Running Diagnostics on Dell Laptops
To ensure accurate and meaningful results when running diagnostics on your Dell laptop, consider the following tips:
1. Before running diagnostics, ensure your laptop is fully charged or connected to a power source to prevent any interruptions during the scanning process.
2. Close any unnecessary programs and disable background applications to maximize system resources and improve the efficiency of the diagnostic tools.
3. Regularly update your laptop’s firmware, drivers, and software to ensure compatibility and optimal performance during diagnostics.
4. Maintain a backup of your important files before performing diagnostics, as some troubleshooting steps may involve making changes or resetting your system.
5. Take note of any error codes or error messages encountered during diagnostics, as they can provide valuable information for troubleshooting or seeking assistance.
By following these tips, you can optimize the diagnostic process and increase the chances of successfully identifying and resolving any issues with your Dell laptop.
Common Diagnostic Results and their Solutions
While the diagnostic results may vary depending on the specific issue, there are several common problems that can be detected through diagnostics. Here are a few examples and their possible solutions:
1. Memory Errors:
If the diagnostics report indicates memory errors, you may need to replace or upgrade the faulty RAM module. Consult your laptop’s documentation or contact Dell support for guidance.
2. Hard Drive Issues:
Should the diagnostics detect hard drive problems, it’s crucial to back up your data as soon as possible. You may need to replace the hard drive and restore your data from the backup.
3. Software Conflicts:
If software conflicts are found, try uninstalling recently installed programs or rolling back recent software updates. You can also consider performing a clean installation of the operating system to resolve any underlying conflicts.
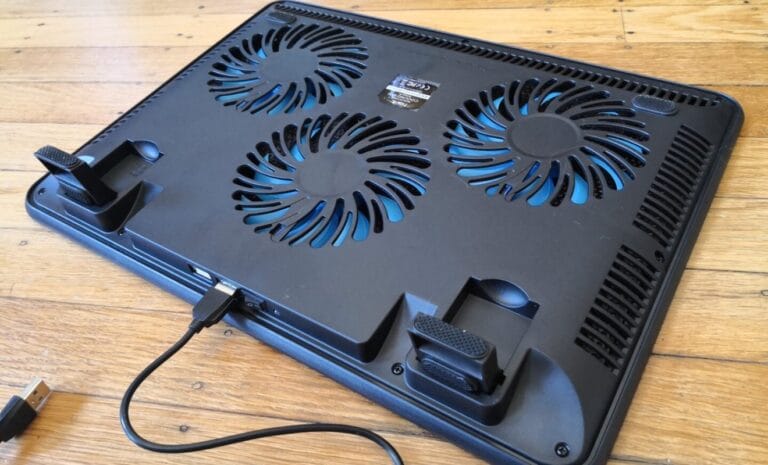
4. Overheating:
Diagnostics may detect overheating issues, which can lead to performance problems and hardware failures. Clean the laptop’s vents and cooling fans to improve airflow and consider using a cooling pad to prevent overheating.
5. Battery Health:
If the diagnostics determine that your laptop’s battery health is deteriorating, you may need to replace the battery. Dell laptops typically have a built-in battery health indicator that can provide more information.
Remember that these are just a few examples of common diagnostic results. The appropriate solutions will depend on the specific issue detected by the diagnostics.
Final Advice for Running Diagnostics on Dell Laptops
Running diagnostics on your Dell laptop is a proactive measure to ensure optimal performance and longevity. By using the methods and tools mentioned in this guide, you can identify any hardware or software issues and take appropriate action. Regularly running diagnostics can help you catch problems early on, potentially saving you time, money, and frustration in the long run. Remember to follow best practices, back up your data, and seek assistance from Dell support if needed. With proper diagnostics and timely troubleshooting, your Dell laptop will continue to be a reliable companion for your computing needs.
Key Takeaways: How to Run Diagnostics on Dell Laptop?
- Running diagnostics on a Dell laptop can help identify and resolve hardware or software issues.
- Start by restarting the laptop and pressing the F12 key repeatedly to enter the Boot Menu.
- Select “Diagnostics” from the Boot Menu options.
- Follow the prompts and let the diagnostics process run.
- Review the results to identify any errors or issues and take appropriate action.
Frequently Asked Questions
Welcome to our Frequently Asked Questions section, where we will provide answers to some commonly asked questions about running diagnostics on Dell laptops. Whether you’re experiencing performance issues or troubleshooting a hardware problem, running diagnostics can help you identify and resolve the issue. Read on to find answers to your questions!
1. How do I access the diagnostics tool on my Dell laptop?
To access the diagnostics tool on your Dell laptop, you can follow these steps. First, make sure your laptop is powered off. Next, power it on. As soon as you see the Dell logo, press the F12 key repeatedly. This will bring up the boot menu. From the boot menu, select “Diagnostics” and press Enter. The diagnostics tool will then start running, checking for any potential issues with your laptop’s hardware and system.
Alternatively, if your Dell laptop does not have the F12 key for accessing the boot menu, you can try pressing the F2 key during startup instead. This will take you to the BIOS setup utility. From there, you should be able to find the diagnostics tool under a section labeled “Diagnostics” or “Hardware Diagnostics”. The exact menu options may vary depending on your Dell laptop model, so be sure to refer to your laptop’s user manual for detailed instructions.
2. What tests are included in the Dell laptop diagnostics?
The Dell laptop diagnostics tool includes a variety of tests to check different components of your laptop’s hardware and system. Some of the common tests you may encounter are:
– Memory test: This test checks the integrity of your laptop’s RAM, ensuring that it is functioning properly.
– Hard Drive test: This test examines your laptop’s hard drive for any potential issues, such as bad sectors or data corruption.
– CPU test: This test evaluates the performance and stability of your laptop’s processor.
– Graphics test: This test checks the functionality of your laptop’s graphics card and display.
– Motherboard test: This test examines the overall functionality of your laptop’s motherboard, including its various components and connections.
These are just a few examples of the tests that may be included in the diagnostics tool. The specific tests available can vary depending on your Dell laptop model and the version of diagnostics tool installed on your laptop.
3. Can I run diagnostics on my Dell laptop without an internet connection?
Yes, you can run diagnostics on your Dell laptop without an internet connection. The diagnostics tool is a built-in feature that resides on your laptop’s hardware and does not require an internet connection to function. It is designed to help you troubleshoot and diagnose hardware and system-related issues, regardless of your internet connectivity.
However, it’s worth noting that some advanced diagnostics features, such as online resources and automated support, may require an internet connection to access additional information or perform more comprehensive tests. If you have a stable internet connection, it may be beneficial to run diagnostics with an internet connection for a more thorough analysis of your laptop’s performance and potential solutions.
4. How long does it take to complete the diagnostics on a Dell laptop?
The time it takes to complete the diagnostics on a Dell laptop can vary depending on the specific tests being performed and the hardware configuration of your laptop. In general, the diagnostics process can take anywhere from a few minutes to an hour or more.
The duration of the diagnostics test also depends on the complexity of the problem you are trying to diagnose. For example, if the diagnostics tool detects an issue and proceeds to perform more in-depth tests or repairs, it may take longer to complete. It’s important to be patient during the diagnostics process and allow it to run until it provides you with the necessary results and recommendations.
5. Can running diagnostics on my Dell laptop fix the issues?
Running diagnostics on your Dell laptop can help identify any hardware or system-related issues, but it does not automatically fix them. The primary purpose of the diagnostics tool is to diagnose and provide you with information about any problems it may find.
Once you have the diagnostics results, it’s up to you to take appropriate actions to fix the issues. In some cases, the diagnostics tool may provide recommended solutions or steps to resolve the identified problems. However, if the diagnostics report is not clear or you are unsure how to proceed, it’s advisable to contact Dell support or consult a professional technician who can guide you through the necessary troubleshooting and repairs.
Summary
Running diagnostics on a Dell laptop is important to identify and fix any issues. To start, press the F12 key while booting up to access the diagnostic menu. Then, choose the “Diagnostics” option and let it run to check for hardware problems. If any issue is detected, note down the error code for reference. Additionally, remember to update drivers, run antivirus scans, and use the SupportAssist tool for further troubleshooting. By following these steps, you can keep your Dell laptop running smoothly and resolve any potential issues.