Are you interested in learning how to create a homemade circular saw table? You’ve come to the right place! In this guide, we’ll show you step-by-step how to build your very own circular saw table from scratch.
It’s a fun and practical DIY project that will not only save you money but also give you a versatile tool for your woodworking projects.
Building a circular saw table may seem intimidating at first, but fear not! With some basic tools and materials, along with a little bit of time and effort, you’ll have a functional and sturdy table ready to go.
Whether you’re a beginner or an experienced woodworker, this project is perfect for anyone looking to take their DIY skills to the next level.
By the end of this guide, you’ll have all the knowledge you need to create a homemade circular saw table that will make your woodworking projects easier and more accurate. So, let’s dive in and get started! Get your tools ready and let’s build something amazing together.

How to Create a Homemade Circular Saw Table
Before going into the in-depth details and steps here is a step-by-step process:
- Gather your materials: sturdy plywood, circular saw, measuring tape, clamps, and screws.
- Measure and cut plywood according to your desired table size.
- Attach supportive bracing underneath the tabletop for added stability.
- Create a cutout area on the tabletop for the circular saw.
- Secure the circular saw to the cutout area using clamps and screws.
- Test the stability and functionality of your homemade circular saw table.
- Enjoy your new DIY circular saw table for all your woodworking projects
Gather the Materials and Tools
The first step in creating a homemade circular saw table is to gather all the necessary materials and tools. Here’s a list of items you’ll need:
- 1/2-inch plywood sheet
- Measuring tape
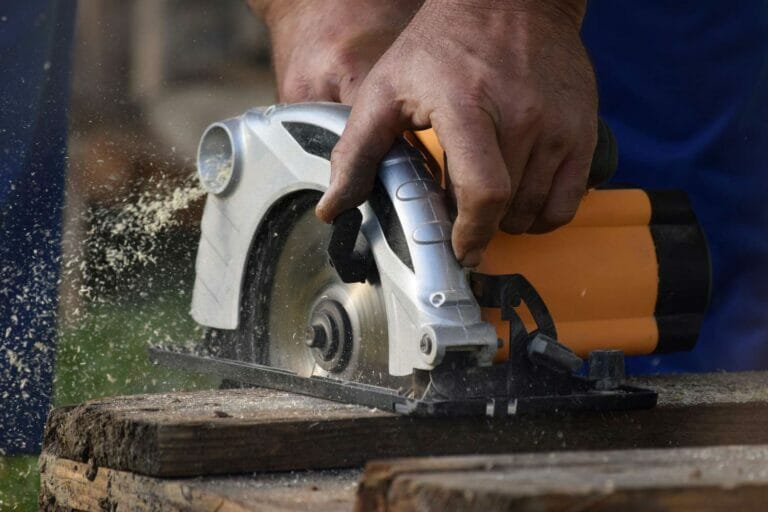
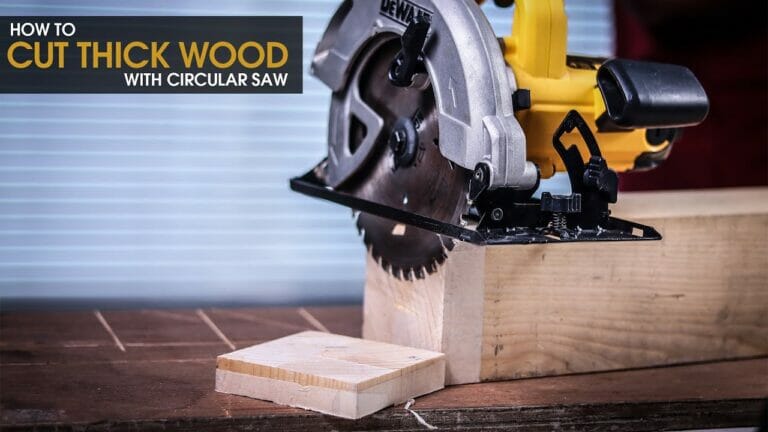
- Circular saw
- Power drill
- Screws
- Safety goggles
- Clamps
- Table saw or jigsaw
- Wood glue
Make sure to gather all the materials and tools before you begin the construction process. This will ensure a smooth and efficient workflow.
Measure and Cut the Plywood
Once you have all the materials and tools ready, the next step is to measure and cut the plywood to the desired size. Use a measuring tape to determine the dimensions of your circular saw table.
Typically, a circular saw table is around 4 feet by 8 feet, but you can adjust the size according to your specific needs.
Once you have the measurements, use a circular saw or a table saw to cut the plywood sheet to the desired dimensions. Make sure to wear safety goggles and take all necessary precautions while operating power tools.
Assemble the Base
With the plywood cut to size, it’s time to assemble the base of your circular saw table. Start by laying out the plywood on a flat and stable surface. Apply wood glue along the edges of the plywood to ensure a strong bond.
Once the glue is applied, carefully position the pieces together and use clamps to hold them in place. Allow the glue to dry according to the manufacturer’s instructions. Once the glue is dry, reinforce the joints by driving screws through the plywood at regular intervals.
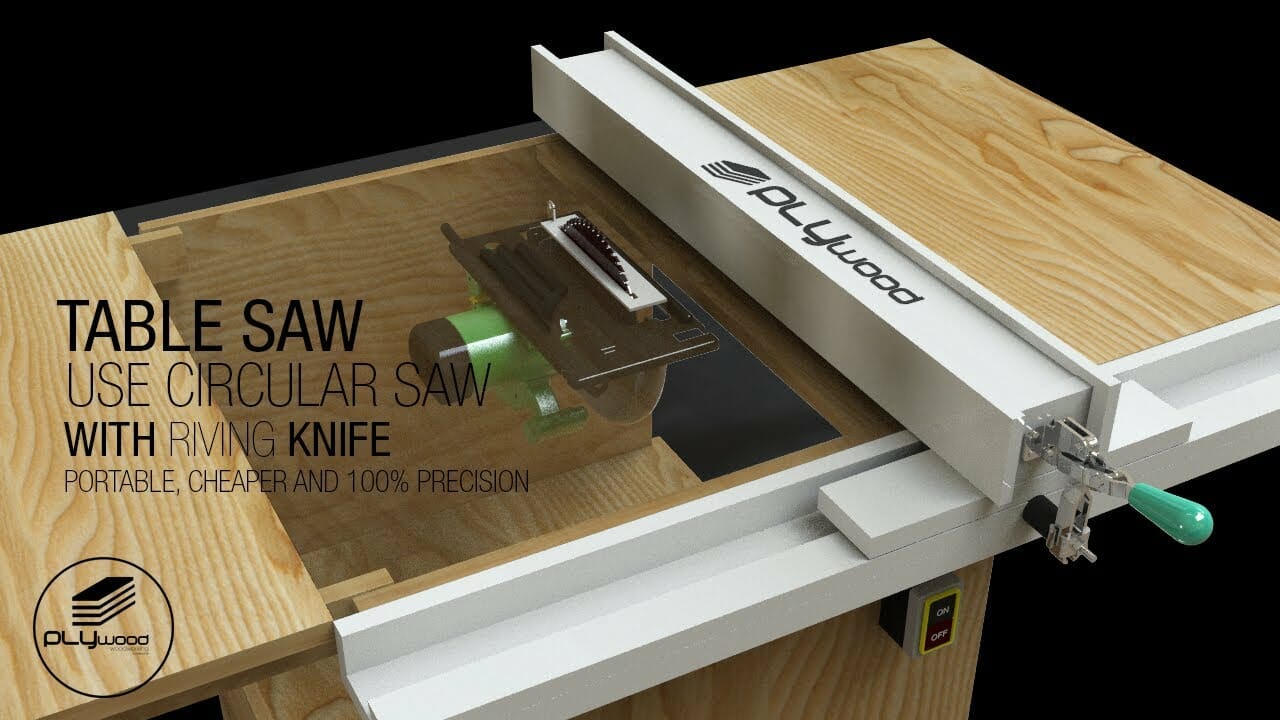
Create a Cutout for the Circular Saw
Now that the base is assembled, it’s time to create a cutout for the circular saw. Measure the dimensions of your circular saw and mark the corresponding area on the plywood.
Use a jigsaw or a circular saw to carefully cut out the marked area. Make sure to follow the manufacturer’s instructions and take all necessary safety precautions.
Once the cutout is complete, test the fit of your circular saw in the opening. Make any necessary adjustments to ensure a snug fit.
Install the Circular Saw and Fence
With the cutout complete, it’s time to install the circular saw and fence on your homemade circular saw table. Attach the circular saw to the base using screws or clamps, following the manufacturer’s instructions.
Next, attach a fence to the table to guide your workpiece during cuts. The fence can be made from a straight piece of wood or a metal guide. Secure the fence to the table using screws or clamps, ensuring it is parallel to the blade of the circular saw.
Add Safety Features and Accessories
To ensure safe operation, it’s important to add safety features and accessories to your homemade circular saw table. Consider adding a blade guard to protect your hands from the spinning blade, as well as a dust collection system to keep your workspace clean.
Additionally, you can add a miter gauge to your circular saw table to make angled cuts. A miter gauge allows you to guide your workpiece accurately when making crosscuts or angled cuts.
Test and Fine-Tune Your Circular Saw Table
Once you have completed the construction of your homemade circular saw table, it’s important to test it and fine-tune any adjustments. Ensure that the circular saw is properly aligned with the cutout and that the fence is parallel to the blade.
Make a few test cuts on scrap wood to verify the accuracy and functionality of your circular saw table. If you notice any issues, make the necessary adjustments to ensure optimal performance.
Benefits of a Homemade Circular Saw Table
Creating a homemade circular saw table offers several benefits:
- Cost-effective: Building your own circular saw table can be more affordable than buying a pre-made one.
- Customization: You can customize the size and features of your circular saw table to suit your specific woodworking needs.
- Satisfaction: Building something with your own hands can be a fulfilling and rewarding experience.
- Enhanced productivity: A well-designed circular saw table can improve your cutting accuracy and efficiency, leading to better results.
Tips for Building a Homemade Circular Saw Table
- Take accurate measurements and double-check your calculations before cutting the plywood.
- Use high-quality plywood and consider reinforcing the base with additional supports for added stability.
- Invest in safety equipment, such as safety goggles and a dust mask, to protect yourself while operating power tools.
- Regularly maintain and clean your circular saw table to ensure optimal performance and longevity.
Building a homemade circular saw table can be a rewarding project that allows you to create a customized tool to suit your woodworking needs.
By following the step-by-step instructions and tips provided in this guide, you’ll be equipped with the knowledge and skills to create a sturdy and reliable circular saw table.
Remember to prioritize safety and precision throughout the construction process, and don’t hesitate to make adjustments to ensure optimal performance. Happy woodworking!
Frequently Asked Questions
Are you looking to create your own homemade circular saw table? We’ve got you covered! Here are some commonly asked questions about building a circular saw table:
1. What materials do I need to build a homemade circular saw table?
To build a homemade circular saw table, you will need a few key materials. First, you’ll need a sturdy table frame made of plywood or other durable wood material.
Additionally, you’ll need a circular saw that fits securely onto the table. Other necessary materials include screws, a measuring tape, a drill, and safety equipment such as goggles and gloves. Don’t forget a level to ensure your table is straight and even!
By gathering these materials, you’ll have everything you need to start building a homemade circular saw table and begin your woodworking projects.
2. How do I design the dimensions of my circular saw table?
When designing the dimensions of your circular saw table, it’s important to consider both the size of your workspace and the types of projects you’ll be working on. Start by measuring the area where you plan to place the table. This will help you determine the maximum dimensions you can work with.
Next, think about the size of the materials you typically work with. If you frequently work with large pieces of wood, you’ll want a larger table surface area.
On the other hand, if you typically work with smaller materials, a compact table may be more suitable. Take these factors into account when deciding on the dimensions of your circular saw table.
3. How should I secure the circular saw to the table?
Securing the circular saw to the table is a crucial step in building a homemade circular saw table. Begin by measuring the base plate of your circular saw and marking these dimensions on the table surface. Make sure to leave enough space for the blade to rotate smoothly.
Once you’ve marked the dimensions, use screws and a drill to attach the circular saw securely to the table. Ensure the saw is aligned properly, allowing for accurate cuts. By securely fastening the circular saw to the table, you’ll have a stable and safe working surface for your woodworking projects.
4. How can I enhance safety when using a homemade circular saw table?
Safety should always be a top priority when using any power tool, including a homemade circular saw table. Utilize safety equipment such as goggles, gloves, and ear protection to protect yourself from potential hazards. Make sure to read the manufacturer’s instructions for using the circular saw and follow all safety precautions.
Additionally, it’s important to keep your workspace clean and organized. Make sure there are no obstructions or loose materials that could interfere with the saw’s operation.
Always use push sticks or tools to guide the material through the saw, keeping your hands safely away from the blade. Following these safety measures will help ensure a safe and enjoyable woodworking experience.
5. Can I customize my homemade circular saw table with additional features?
Absolutely! One of the great benefits of building your own circular saw table is the ability to customize it to fit your specific needs. You can add features such as built-in storage compartments for tools, adjustable fences for precise cuts, or even a dust collection system to keep your workspace clean.
When customizing your table, think about the types of projects you’ll be working on most frequently and what features would enhance your woodworking experience. With a little creativity and ingenuity, you can personalize your homemade circular saw table to make it the perfect tool for your craft.
Creating a homemade circular saw table can be a fun and rewarding project. By following a few simple steps, you can have a safe and efficient tool for your woodworking needs.
First, gather the necessary materials like plywood, screws, and a circular saw. Then, measure and cut the plywood to the desired size for the table.
Attach the legs and reinforce the structure with additional supports. Finally, secure the circular saw to the table using clamps for stability. Remember to always wear safety goggles and take proper precautions when operating the saw.
In conclusion, with some basic tools and a little know-how, you can make your own circular saw table. This homemade table will not only save you money but also give you a sense of accomplishment. So go ahead and get started on your DIY project today!