Are you wondering how to change the water filter in your French door fridge? Well, you’ve come to the right place! Let’s dive into the world of fridge maintenance and learn how to keep your water filter fresh and your drinking water clean.
Picture this: you’re thirsty on a hot summer day and decide to pour yourself a nice glass of cold water from your fridge. But wait! Is your water filter due for a change? Don’t worry, I’ve got you covered. In this guide, we’ll walk through the step-by-step process of changing the water filter in a French door fridge.
So grab your toolbox (don’t worry, it’s not as intimidating as it sounds) and let’s embark on this adventure together. By the end of this guide, you’ll be a pro at maintaining your fridge’s water filter and ensuring your hydration stays top-notch. Ready? Let’s get started!
- Locate the water filter compartment. It is usually located in the upper-right corner of the fridge.
- Open the compartment door and remove the old filter by turning it counterclockwise.
- Dispose of the old filter properly.
- Take the new filter and remove the protective cap.
- Insert the new filter into the compartment and turn it clockwise until it locks into place.
- Close the compartment door and run a few gallons of water through the dispenser to flush the filter.

How To Change The Water Filter In A French Door Fridge: A Step-by-Step Guide
Looking to change the water filter in your French Door Fridge? We’ve got you covered with this comprehensive guide. Whether you’re a first-time filter changer or just need a quick refresher, we’ll walk you through the process step by step, ensuring clean and fresh water for you and your family. Let’s dive in!
Why Is Changing the Water Filter Important?
Regularly changing the water filter in your French Door Fridge is crucial for maintaining the quality and taste of drinking water. The filter’s primary function is to remove contaminants and impurities, such as sediment, chlorine, and metals, ensuring that the water you consume is safe and clean. Over time, filters can become clogged and less effective, leading to a decrease in water quality. By changing the filter as recommended by the manufacturer, you can ensure that your fridge will continue to provide you with clean and refreshing water.
Step 1: Know Your Fridge’s Water Filter
The first step in changing the water filter is to identify the specific filter used in your French Door Fridge model. Most fridges have filters located either at the top right corner or bottom grille. Refer to your fridge’s user manual or the manufacturer’s website to determine the correct filter part number and replacement intervals. It’s important to use only genuine, compatible filters to maintain the effectiveness of your fridge’s filtration system.
Once you have the correct filter information, acquire a replacement filter. You can typically purchase them from the manufacturer’s website, authorized dealers, or reputable appliance stores.
Step 1.1: Types of Filters
French Door Fridges commonly use two types of filters: internal and external. Internal filters are typically found inside the fridge, either at the top right corner or in the bottom grille. External filters are installed in the back of the fridge where the water line connects. Knowing which type your fridge uses will help you locate and replace the filter with ease.
Step 1.2: Filter Replacement Intervals
Manufacturers usually recommend replacing the water filter every six months to ensure optimal performance. However, different factors may influence this duration. If you have a large household or use a higher volume of water, you may need to replace the filter more frequently. Additionally, if your fridge has a filter life indicator, it will notify you when it’s time for a replacement.
Step 2: Locate and Remove the Old Filter
Now that you have your replacement filter ready, it’s time to find and remove the old one. As mentioned earlier, the location of the filter can vary depending on your fridge model. If your fridge has an internal filter, it is usually found in the top right corner or bottom grille.
To remove the filter, follow these general steps:
1. Turn off the water supply to the fridge by either shutting off the main water valve or using the water supply shut-off feature, if available.
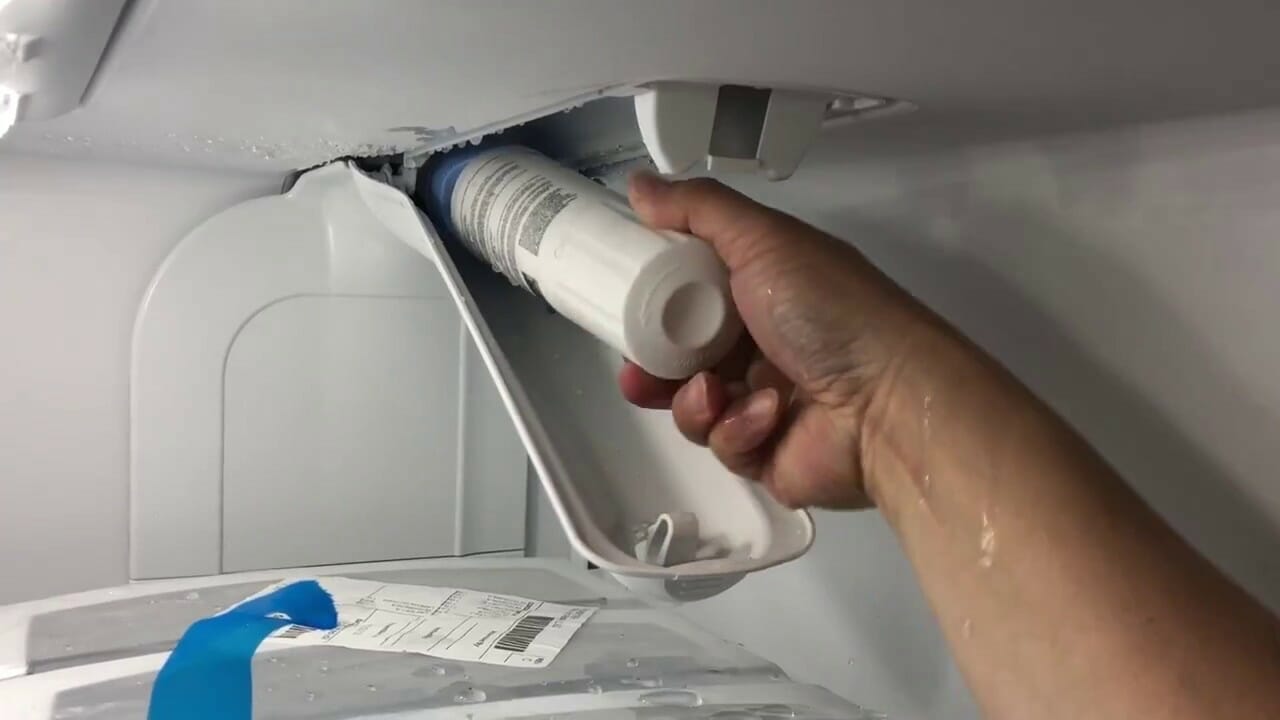
2. Open the fridge doors and locate the filter compartment. If it’s in the top right corner, remove the filter cover by pushing the tab and pulling it out. If it’s in the bottom grille, there may be a button or latch to release the filter.
3. Once the cover or latch is removed, carefully slide the old filter out of its housing. Be cautious of any water that may be trapped in the filter or housing.
4. Dispose of the old filter properly, following your local recycling guidelines.
Step 3: Prepare and Install the New Filter
Now that the old filter is out of the way, it’s time to prepare and install the new one. Before inserting the new filter, be sure to read the instructions provided by the manufacturer. Different filters may have specific installation procedures.
Follow these general steps to install the new filter:
1. Remove the protective cap or packaging from the new filter.
2. Check for any seals or stickers on the new filter and remove them.
3. Align the new filter with the arrow or other markings on the filter housing.
4. Insert the new filter into the housing, pushing it in firmly until it clicks into place.
5. If your fridge’s filter compartment has a cover or latch, reattach it securely.
Step 4: Purge Air and Reset the Filter Indicator
After installing the new filter, it’s important to purge any air that may be trapped in the system. This ensures that fresh and clean water is dispensed. To do this, follow these steps:
1. Turn on the water supply to the fridge.
2. Dispense water from the water dispenser for approximately three minutes. This will help remove any air pockets and flush out the system.
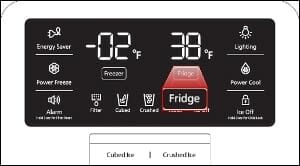
3. If your fridge has a filter life indicator, reset it according to the manufacturer’s instructions. This will ensure accurate monitoring of the filter’s lifespan until the next replacement.
Step 5: Enjoy Clean and Refreshing Water
Congratulations! You have successfully changed the water filter in your French Door Fridge. Now, sit back, relax, and enjoy the benefits of clean and refreshing water at your fingertips. Remember to mark your calendar or set a reminder to replace the filter again in six months or as advised by the manufacturer. By following these simple steps, you can maintain the highest quality of water for yourself and your loved ones.
Additional Tips and Maintenance
Common Questions About Changing the Water Filter
Q: Can I use generic or third-party filters instead of the manufacturer’s recommended filters?
Using generic or third-party filters is not recommended. While they may be cheaper, they may not be compatible with your specific fridge model or meet the same quality standards as the manufacturer’s filters. To ensure the best performance and water quality, it’s always advisable to use genuine, recommended filters.
Q: How do I know when it’s time to change the water filter?
Most French Door Fridges have a filter life indicator that alerts you when it’s time to replace the filter. This indicator may be a countdown timer or a light that turns on when the filter needs replacement. If your fridge doesn’t have an indicator, it’s generally recommended to replace the filter every six months or according to the manufacturer’s instructions.
Q: What will happen if I don’t change the water filter regularly?
Failing to replace the water filter regularly can lead to a decrease in water quality. Over time, the filter can become clogged and less effective in removing contaminants and impurities. This can result in water that tastes and smells unpleasant. Additionally, an old filter may not provide adequate protection against harmful substances, compromising the safety of the water you consume.
Remember to consult your fridge’s user manual or the manufacturer’s website for specific instructions and recommended replacement intervals tailored to your model. By following these guidelines, you can ensure that your French Door Fridge continues to deliver clean and refreshing water for years to come.
Key Takeaways – How To Change The Water Filter In A French Door Fridge?
- 1. Locate the water filter compartment in your French door fridge.
- 2. Turn off the water supply to the fridge before removing the old filter.
- 3. Twist and pull the old filter to remove it from the compartment.
- 4. Insert the new water filter into the compartment and twist it to secure it.
- 5. Turn on the water supply and run water through the filter for a few minutes to flush out any air or impurities.
Frequently Asked Questions
When it comes to changing the water filter in a French door fridge, many people have questions. Here are some of the most common queries and their answers:
1. How often should I change the water filter in my French door fridge?
The general recommendation is to change the water filter every six months. This duration ensures that the filter continues to effectively remove impurities and provide clean water. However, some factors like water quality and usage may require more frequent replacements. If you notice a decrease in water flow or a change in the taste or odor of the water, it may be time to replace the water filter.
Additionally, some refrigerators have filter indicator lights that signal when it’s time for a replacement. Check your fridge’s user manual for specific guidelines, as different models may have varying suggestions.
2. How do I know which water filter to buy for my French door fridge?
To find the right water filter for your French door fridge, you’ll need to check the manufacturer’s recommendations. The user manual or the label inside the fridge door usually provide the necessary information. Look for the filter model or part number and make note of it.
Once you have the filter information, you can search for a replacement online or visit a home appliance store. It’s important to buy a genuine filter or a compatible replacement to ensure proper fit and optimal filtration performance.
3. How do I remove the old water filter from my French door fridge?
The process of removing the old water filter from a French door fridge varies depending on the model, but it typically involves the following steps:
- Locate the water filter compartment. It’s usually located inside the fridge, either at the top or bottom.
- Turn off the water supply to the fridge, usually by turning the valve behind the appliance.
- Twist or unscrew the old filter counterclockwise to remove it. There may be a button or a release mechanism for some models.
- Dispose of the old filter properly, following local recycling guidelines if applicable.
For specific instructions, refer to your fridge’s user manual or consult the manufacturer’s website.
4. How do I install a new water filter in my French door fridge?
To install a new water filter in your French door fridge, follow these general steps:
- Make sure the new filter is compatible with your fridge model.
- Locate the filter compartment inside the fridge.
- Remove any protective covers or seals from the new filter.
- Insert the new filter into the compartment, aligning it with the filter housing.
- Twist or screw the filter clockwise until it’s securely in place.
- Turn on the water supply to the fridge and check for any leaks.
Again, it’s essential to refer to your fridge’s manual or consult the manufacturer for specific instructions tailored to your model.
5. Can I change the water filter in my French door fridge by myself, or do I need professional help?
Changing the water filter in a French door fridge is usually a straightforward task that you can do yourself. Most fridge models are designed for easy filter replacement, and the procedure doesn’t require any special tools or expertise.
However, if you’re unsure or uncomfortable with DIY projects, you can always seek professional assistance. Contact your fridge’s manufacturer or a certified technician to perform the filter replacement if you prefer to have expert help.
Summary
Changing the water filter in your French door fridge is easy! Just follow these simple steps. First, locate the filter at the back or inside of the fridge. Next, turn off the water supply and remove the old filter. Then, insert the new filter by twisting it clockwise. Finally, turn on the water supply and run water through the filter to remove any air bubbles. Remember to replace the filter every 6 months for clean and fresh water.
Taking care of your fridge’s water filter is important for your health and the taste of your water. Follow these steps and you’ll have clean and refreshing water in no time.