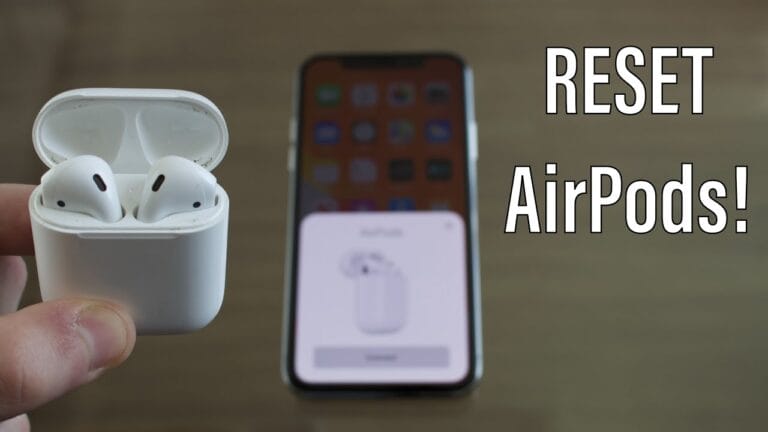
Are you a proud owner of AirPods? Wondering how to adjust those nifty settings? Well, you’ve come to the right place! In this article, we’ll walk you through the simple steps to customize your AirPods and make them work perfectly for you. So, let’s dive in and discover how to tweak your AirPods settings to elevate your listening experience!
Picture this: you’re jamming to your favorite tunes but the volume isn’t quite right. No worries! We’ll show you how to adjust the volume on your AirPods effortlessly.
Plus, we’ll explore how to link your AirPods to Siri, enabling you to control your music, answer calls, and even get directions with just a tap. Say goodbye to fumbling with your phone – your AirPods will be your new best friend!
But wait, there’s more! Did you know you can customize the double-tap feature on your AirPods? Yep, that’s right! We’ll guide you through the process of assigning different functions to each AirPod, from skipping tracks to activating Siri.
Prepare to unleash the full potential of your AirPods and take your listening experience to the next level. Let’s get started!
How to Customize Your AirPod Settings
Want to personalize your AirPods? Follow these steps to adjust the settings:
1. Connect your AirPods to your device.
2. Go to the Settings app on your device.
3. Select Bluetooth and find your AirPods.
4. Tap on the “i” icon next to your AirPods.
5. Customize settings like double-tap functions, automatic ear detection, and more.
With these simple steps, you can customize your AirPod settings to enhance your listening experience!

How to Adjust AirPod Settings: Mastering Your Wireless Audio Experience
AirPods have revolutionized the way we listen to music and make phone calls. These sleek wireless earbuds from Apple offer a seamless audio experience, but did you know that you can customize and adjust various settings to enhance your usage?
In this comprehensive guide, we will explore how to harness the power of AirPod settings and optimize your audio experience. From customizing controls to adjusting sound quality, let’s dive into the world of AirPod settings and unlock their full potential.
Also read: Do Airpods Fall Out Easily? (Solution)
The Basics: Getting Familiar with AirPod Settings
Before we delve into the intricacies of adjusting AirPod settings, let’s start with the basics. To access your AirPod settings, make sure your AirPods are connected to your iPhone or iPad.
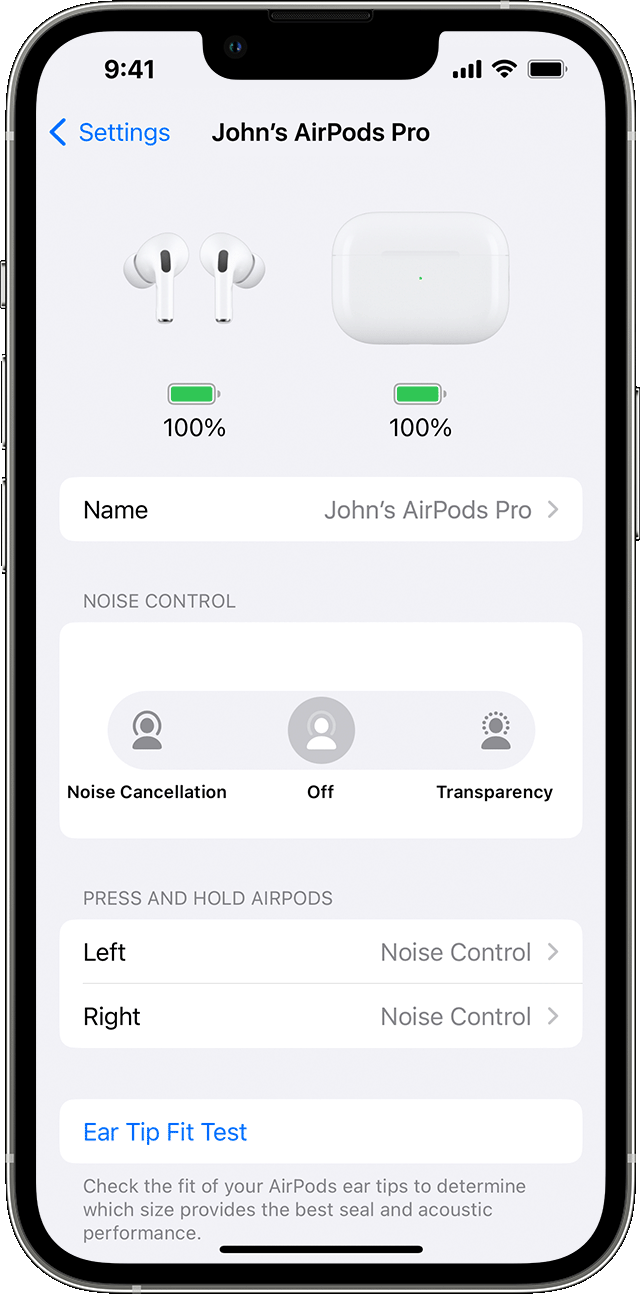
Open the Settings app, scroll down, and tap on “Bluetooth.” Locate your AirPods in the list of available devices and tap on the “i” icon next to it. This will take you to the settings page specifically for your AirPods.
1. Customizing Double-Tap Gestures for AirPods
AirPods allow you to control various functions with double-tap gestures. By default, double-tapping on the left AirPod activates Siri, while double-tapping on the right AirPod plays or pauses audio. However, you can customize these gestures according to your preferences.
One of the key options is changing the activating function of Siri on the left AirPod to Play/Pause, Next Track, Previous Track, or Off.
Similarly, you can assign different functions to the right AirPod, such as activating Siri, Play/Pause, Next Track, Previous Track, or Off.
To customize double-tap gestures, follow these steps:
1. Open the Settings app on your iPhone or iPad.
2. Scroll down and tap on “Bluetooth.”
3. Locate your AirPods in the list of connected devices and tap on the “i” icon.
4. In the AirPod settings page, tap on “Left” or “Right” under Double-Tap on the AirPod section.
5. Choose the desired function from the available options or disable it completely.
6. Repeat the steps for the other AirPod to customize its double-tap gesture.
By customizing these double-tap gestures, you can conveniently control your AirPods without even taking out your phone from your pocket.
2. Adjusting Sound Quality and Noise Cancellation
AirPods Pro offers active noise cancellation, which cuts off external noise and immerses you in your audio. While the noise cancellation feature enhances your auditory experience, you might occasionally want to let some sounds in, especially in crowded or outdoor settings.
Adjusting the transparency and sound quality settings can help you strike a balance between audio immersion and environmental awareness.
To adjust the sound quality and noise cancellation settings of your AirPods Pro, follow these steps:
1. Open the Settings app on your iPhone or iPad.
2. Scroll down and tap on “Bluetooth.”
3. Locate your AirPods Pro in the list of connected devices and tap on the “i” icon.
4. In the AirPods Pro settings page, tap on “Noise Cancellation” or “Transparency” to toggle between the modes.
5. Noise Cancellation blocks out background noise, while Transparency allows environmental sounds to come through.
6. Toggle the switch to choose the mode that suits your current surroundings and preferences.
By adjusting these settings, you can enjoy your audio content while still remaining aware of your surroundings when needed.
3. Configuring Automatic Ear Detection and Ear Tip Fit Test
AirPods incorporate smart technology that can automatically detect when you’re wearing them. This feature is called Automatic Ear Detection and ensures that your AirPods seamlessly switch between audio sources and conserve battery life when not in use.
To enable or disable Automatic Ear Detection, follow these steps:
1. Open the Settings app on your iPhone or iPad.
2. Scroll down and tap on “Bluetooth.”
3. Locate your AirPods in the list of connected devices and tap on the “i” icon.
4. In the AirPod settings page, toggle the switch next to “Automatic Ear Detection” to enable or disable it.
AirPods Pro also offers an Ear Tip Fit Test that ensures you have the correct size ear tips for optimal comfort and sound quality. The test checks the fit of the ear tips in your ear canal and provides recommendations if adjustments are necessary.
To perform an Ear Tip Fit Test, follow these steps:
1. Open the Settings app on your iPhone or iPad.
2. Scroll down and tap on “Bluetooth.”
3. Locate your AirPods Pro in the list of connected devices and tap on the “i” icon.
4. In the AirPods Pro settings page, tap on “Ear Tip Fit Test.”
5. Follow the on-screen instructions to perform the test and receive recommendations if needed.
By utilizing these features, you can ensure that your AirPods fit comfortably and provide the best audio experience possible.
4. Managing AirPod Firmware Updates
Just like any other software, AirPods receive firmware updates from time to time. These updates may include bug fixes, performance enhancements, and even new features. It is essential to keep your AirPods up to date to benefit from these improvements.
Normally, AirPods firmware updates automatically when they are connected to your iPhone or iPad and charging in the AirPods case. However, you can also manually check for firmware updates and ensure that you have the latest version.
To check for AirPod firmware updates, follow these steps:
1. Open the Settings app on your iPhone or iPad.
2. Scroll down and tap on “Bluetooth.”
3. Locate your AirPods in the list of connected devices and tap on the “i” icon.
4. In the AirPod settings page, check the “Firmware Version” section.
5. If an update is available, a prompt will appear, and you can proceed with the update process.
Regularly updating your AirPods firmware will ensure that you have access to the latest features and improvements from Apple.
That concludes our exploration of adjusting AirPod settings to enhance your audio experience. By customizing double-tap gestures, adjusting sound quality, managing automatic ear detection, and updating firmware, you can make the most of your AirPods and tailor them to your preferences.
Whether you’re a music lover or rely on AirPods for work calls, these settings will help you optimize your wireless audio experience. Embrace the customization options and take your AirPods usage to the next level. Happy listening!
Key Takeaways: How to Adjust Airpod Settings?
- Access the AirPods settings through your device’s Bluetooth menu.
- Customize the double-tap feature to activate Siri, play/pause music, or skip tracks.
- Adjust the microphone settings for calls, Siri, or audio recording.
- Enable or disable automatic ear detection to pause/resume playback.
- Choose whether to use both AirPods or one at a time for audio playback.
Frequently Asked Questions
Are you having trouble adjusting the settings on your AirPods? Look no further! We’ve got you covered with these frequently asked questions:
1. How do I change the double-tap function on my AirPods?
To modify the double-tap function on your AirPods, open your iPhone’s Settings app and go to Bluetooth. Find your AirPods in the list of devices and tap on the “i” icon next to it. From there, you can choose your preferred action for both the left and right AirPod, such as play/pause, skip forward, or activate Siri. Select your desired option, and you’re good to go!
If you’re using an Android device, you can adjust the double-tap function using the settings provided by your phone’s manufacturer or through third-party apps specifically designed for AirPods.
2. Can I customize the sound settings on my AirPods?
Absolutely! To customize the sound settings on your AirPods, open the Settings app on your iPhone, tap on Accessibility, and select Audio/Visual.
From there, you can adjust the sound balance between the left and right AirPods, enabling you to compensate for any hearing differences. You can also enable features like Live Listen, which amplifies the sound around you and directs it to your AirPods, essentially transforming them into remote microphones.
It’s important to note that some sound settings like equalizer adjustments and bass/treble settings can’t be changed natively on AirPods. However, you can use third-party music apps that offer these customization options to tailor the sound to your liking.
3. How do I check the battery percentage of my AirPods?
To check the battery level of your AirPods on an iPhone, simply open the charging case with the AirPods inside, and a small battery icon will appear on your device.
It indicates the remaining battery percentage of both the AirPods and the case. If you have an Android device, you can download apps like “AirBattery” or “Assistant Trigger” that will display the battery level when your AirPods are connected.
To check the battery status of individual AirPods when you’re wearing them, you can simply ask Siri on your iOS device, “Hey Siri, what’s the battery percentage on my AirPods?” Siri will provide you with the information you need.
4. Can I use the “Hey Siri” feature with my AirPods?
Yes, you can use the “Hey Siri” feature with your AirPods, provided they have the necessary firmware. To activate this feature, make sure your AirPods are connected to your iOS device and say “Hey Siri.” Siri will respond, and you can ask any question or give commands without needing to pick up your phone. You can also disable this feature by going to your AirPods’ settings in your iPhone’s Bluetooth menu.
Please note that this feature requires an internet connection, as it relies on Apple’s servers to process your requests and provide accurate responses.
5. How do I update the firmware on my AirPods?
Your AirPods receive firmware updates automatically when you connect them to your iOS device. These updates typically occur when your AirPods are in the charging case, connected to your iPhone, and the iPhone is connected to the internet. Make sure your iPhone is running the latest version of iOS to ensure your AirPods are updated with the latest firmware.
If you’re using an Android device, unfortunately, you won’t be able to update the firmware on your AirPods, as only iOS devices support this feature.
So, now you know how to adjust settings on your AirPods. First, make sure they’re connected to your device. Then, go to the Bluetooth settings and select your AirPods.
You can change the name, double-tap functionality, microphone settings, and more. Just remember to test and adjust until everything is perfect for you. Enjoy your AirPods experience!