If you’ve ever wondered how to properly seal the area around your sink, you’re in the right place! We’ve got you covered with practical tips and step-by-step instructions. So, let’s dive in and learn how to tackle this important home improvement task with ease.
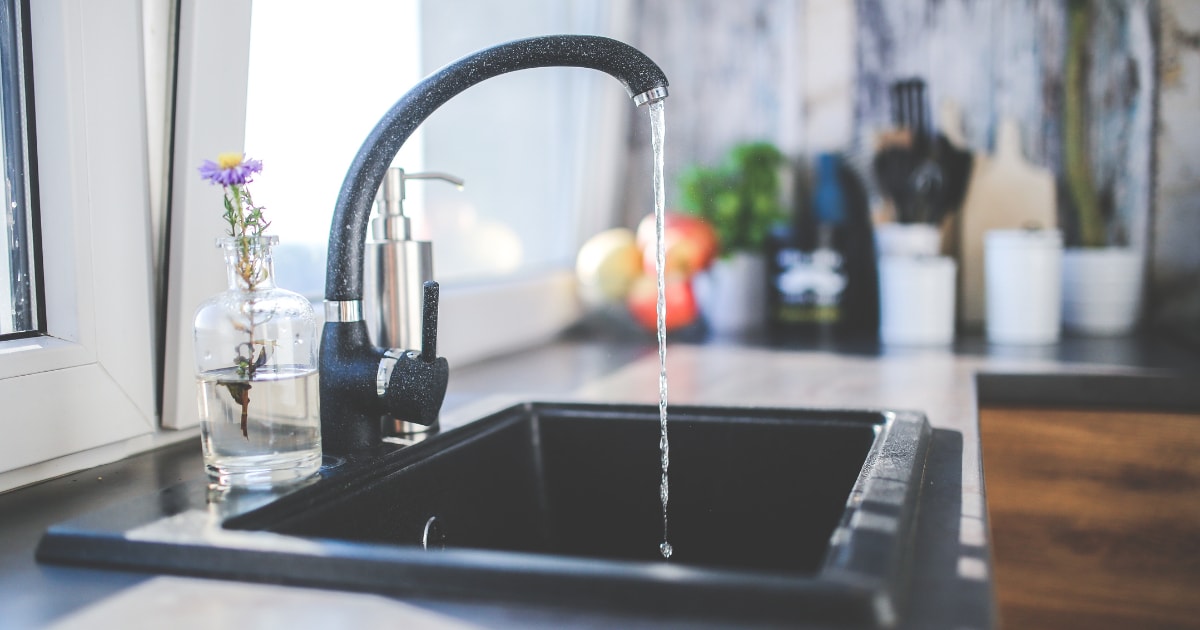
When it comes to sealing the area around your sink, it’s all about preventing water damage and keeping everything nice and tidy. A well-sealed sink ensures that water doesn’t sneak its way into hidden spaces, causing mold, mildew, or even structural damage. So, let’s roll up our sleeves and make sure your sink is properly sealed!
Are you ready to become a DIY expert? We’ll walk you through the process, from selecting the right sealant to applying it like a pro. Get ready to impress your family and friends with your newfound knowledge and skills. Let’s get started on sealing the area around your sink and make it shine!
How to Properly Seal the Area Around the Sink?
1. Clean the area around the sink thoroughly, removing dirt and debris.
2. Apply a bead of silicone caulk along the edges of the sink, ensuring it covers any gaps.
3. Smooth the caulk with a caulk smoothing tool or your finger.
4. Wipe away any excess caulk with a damp cloth.
5. Allow the caulk to dry completely before using the sink.
By following these steps, you can effectively seal the area around the sink and prevent water damage or leaks.
Why Is it Important to Properly Seal the Area Around the Sink?
Before we dive into the details of how to properly seal the area around your sink, let’s first understand why it is so important. When water splashes around your sink, it can easily find its way into tiny cracks and gaps, leading to water damage, mold growth, and even structural issues. By sealing the area, you create a barrier that keeps water where it belongs, preventing these problems from occurring. Additionally, a properly sealed sink area enhances the overall aesthetic of your kitchen or bathroom, providing a clean and professional look.
Step 1: Gather the Necessary Tools and Materials
Before you begin sealing the area around your sink, it is essential to gather all the necessary tools and materials. This will ensure a smooth and efficient process. Here are the items you will need:
- Caulking gun
- Silicone caulk
- Caulk remover
- Razor scraper
- Painter’s tape
- Denatured alcohol
- Paper towels
- Latex gloves
Make sure to have all these items ready before you start, as it can be frustrating to have to interrupt the process to find a missing tool or material.
Step 2: Remove the Old Caulk
Before you can apply a new sealant, you need to remove the old caulk. Use a caulk remover or a razor scraper to carefully scrape away the old caulk from the edges of the sink and countertop. Be gentle to avoid damaging the surfaces. Once the old caulk is removed, clean the area with denatured alcohol and a paper towel to ensure there is no residue left behind.
Step 3: Prepare the Surface
Next, it’s time to prepare the surface for the new sealant. Use painter’s tape to mask off the areas surrounding the sink to protect them from accidental caulk smears. Clean the surfaces again with denatured alcohol to remove any remaining debris. Ensure the area is dry before moving on to the next step.
Step 4: Apply the New Caulk
Now it’s time to apply the new caulk. Load the caulk tube into the caulking gun and cut off the tip at a 45-degree angle. Apply a thin, even bead of caulk along the seam where the sink and countertop meet. Use steady pressure and keep the caulk gun at a consistent angle to ensure a smooth application. Work your way around the entire perimeter of the sink, being careful not to apply too much caulk.
Step 5: Smooth and Shape the Caulk
Once you have applied the caulk, use a wet finger or a caulk finishing tool to smooth and shape the caulk. This will remove any excess caulk and create a clean, professional-looking finish. Wet your finger or the finishing tool with water, then gently run it along the caulk line, pressing down lightly to create a slight concave shape. This will help the caulk adhere better and prevent water from pooling on the surface.
Step 6: Let the Caulk Cure
After you have smoothed and shaped the caulk, allow it to cure according to the manufacturer’s instructions. This typically takes 24-48 hours, during which time you should avoid touching or disturbing the caulk. Keep the area dry to ensure proper curing.
Maintaining the Sealed Area Around the Sink
Once you have properly sealed the area around your sink, it is important to maintain it to ensure its longevity. Here are some tips for maintaining the sealed area:
- Regularly inspect the caulk for signs of wear or damage. If you notice any cracks or gaps, reapply the caulk to maintain a watertight seal.
- Avoid using abrasive cleaners or scrub brushes near the sealed area, as they can damage the caulk.
- Wipe up any spills or splashes immediately to prevent water from seeping into the caulk.
- Use a mildew-resistant caulk to prevent mold and mildew growth in damp environments.
Common Mistakes to Avoid
While sealing the area around the sink may seem straightforward, there are some common mistakes that you should be aware of and avoid making:
Not Removing the Old Caulk Properly
Failure to completely remove the old caulk can lead to a poor seal and cause the new caulk to peel or crack. Take the time to properly remove all traces of the old caulk before applying the new sealant.
Using the Wrong Type of Caulk
Not all caulk is suitable for sealing sinks. Be sure to use a silicone-based caulk that is specifically designed for use in wet areas. This will ensure a durable and long-lasting seal.
Applying Too Much Caulk
Excessive caulk can create a messy appearance and make it difficult to achieve a smooth finish. Apply a thin, even bead of caulk to avoid these issues and ensure a proper seal.
Additional Tips and Tricks
Here are some additional tips and tricks to help you achieve a professional-looking seal:
Mask Off the Area
Using painter’s tape to mask off the area around the sink will help you achieve clean, straight lines and prevent caulk smears on the countertop or backsplash.
Use a Caulk Finishing Tool
A caulk finishing tool can help you achieve a smooth, even finish and remove excess caulk without the need for a wet finger. It is a handy tool that can make the sealing process easier and more efficient.
Practice on a Scrap Piece
If you are not confident in your caulk application skills, practice on a scrap piece of material before tackling the actual sink area. This will help you get a feel for the caulking gun and ensure a neater application.
With these tips and instructions, you are now equipped with the knowledge to properly seal the area around your sink. Remember to gather all the necessary tools and materials, remove the old caulk, prepare the surface, apply the new caulk, smooth and shape it, and let it cure. Regularly maintain the sealed area to ensure its longevity. Avoid common mistakes and follow the additional tips and tricks for a professional-looking finish. Enjoy the benefits of a properly sealed sink area and say goodbye to water damage and mold growth!
Frequently Asked Questions
When it comes to properly sealing the area around the sink, you want to ensure a watertight and secure seal to prevent leaks and water damage. Here are some commonly asked questions about how to achieve this:
1. Why is it important to seal the area around the sink?
Sealing the area around the sink is important because it helps prevent water from seeping into gaps or cracks, which can lead to damage in the long run. Without a proper seal, water can penetrate into the cabinetry or countertop, causing wood to warp or form mold. It also helps to maintain the aesthetics of the sink and countertop by preventing any grime or dirt from getting trapped in the gaps.
Additionally, a well-sealed sink area helps improve the overall hygiene of your kitchen, as it prevents bacteria and moisture buildup. By sealing this area properly, you can safeguard your investment and ensure the longevity of your sink and countertop.
2. What materials do I need to properly seal the area around the sink?
To properly seal the area around the sink, you will need a few essential materials:
– Silicone caulk: This is a waterproof and flexible material that is commonly used for sealing sinks. Make sure to choose a caulk that is specifically designed for kitchen and bathroom use.
– Caulk gun: This tool will help you dispense the caulk evenly and smoothly along the edges of the sink.
– Utility knife: A utility knife will come in handy for removing old caulk or trimming the excess caulk after sealing.
– Cleaning materials: Before sealing, make sure to thoroughly clean the area around the sink to remove any dirt, grease, or old caulking residue.
With these materials, you’ll be well-equipped to properly seal the area around your sink and achieve a professional-looking result.
3. How do I prepare the area before sealing around the sink?
Before sealing the area around the sink, it’s important to properly prepare the surface to ensure a successful seal. Here’s how you can do it:
– Remove the old caulk: Use a utility knife or caulk remover tool to carefully cut and remove any old caulk. Make sure to clean the area thoroughly afterwards.
– Clean the surface: Use a mild cleaner and a soft cloth to clean the surface around the sink. Remove any dirt, grease, or grime to ensure proper adhesion of the new caulk.
– Dry the area: Make sure the area is completely dry before applying the new caulk. Any moisture present can prevent the caulk from adhering properly.
– Mask off the area: If desired, you can use painter’s tape to mask off the edges around the sink. This will help ensure a clean and straight caulk line.
By following these steps, you’ll create an ideal surface for the new caulk to adhere to and provide a long-lasting seal around your sink.
4. How do I apply the caulk to properly seal the area around the sink?
To apply the caulk and achieve a proper seal around the sink, follow these steps:
– Insert the caulk tube into a caulking gun and cut off the tip of the caulk tube at a 45-degree angle.
– Hold the caulking gun at a 45-degree angle and apply an even bead of caulk along the gap between the sink and the countertop.
– Use your finger or a caulk smoothing tool to gently press and smooth the caulk into the gap, ensuring full coverage.
– Wipe away any excess caulk with a damp cloth or sponge, maintaining a clean and neat finish.
– Let the caulk dry and cure according to the manufacturer’s instructions before using the sink.
By following these steps and taking your time to apply the caulk evenly, you’ll achieve a properly sealed area around the sink and minimize the risk of leaks or water damage.
5. How often should I reseal the area around the sink?
The frequency of resealing the area around the sink depends on various factors such as the type of caulk used, the quality of the initial seal, and the amount of wear and tear the sink area experiences. However, as a general guideline, it is recommended to inspect the seal annually and reseal if any cracks or gaps are present.
If you notice any signs of water damage, mold growth, or a weakening seal, it’s best to address it promptly by resealing the area. Regular maintenance and keeping an eye out for any potential issues will help you catch any problems early on and ensure the ongoing effectiveness of the seal around your sink.
A properly sealed area around the sink is important to protect your home from water damage. Start by cleaning and drying the area before applying silicone caulking. Use a caulk gun to create a smooth and even seal around the edges of the sink. Allow the caulk to dry completely before using the sink again.
Remember to check for any leaks or cracks regularly and reseal as necessary. By properly sealing the area around the sink, you can prevent water from seeping into the walls, cabinets, or floor and keep your kitchen or bathroom safe and dry.