Welcome to the exciting world of gaming control! Get ready to level up your gaming experience with Switch Wireless Controllers. Whether you’re an avid gamer or just starting out, these controllers are designed to give you seamless control over your gameplay.
With Switch Wireless Controllers, you can navigate your way through virtual worlds with ease. No more frustrating wires getting in the way or limiting your movement.
These controllers offer the freedom to play your favorite games from any position, giving you the flexibility to find the most comfortable gaming setup.
But what makes these controllers so special? Stay tuned as we delve into the features that make Switch Wireless Controllers a must-have accessory for any gaming enthusiast.
We’ll explore their ergonomic design, precise controls, and compatibility with the Nintendo Switch console, making them a game-changer in the world of gaming control. So, grab your popcorn and get ready to embark on an epic gaming adventure!
2. Go to the Home menu and navigate to System Settings.
3. Select Controllers and Sensors.
4. Choose Change Grip/Order.
5. Press and hold the Sync button on your wireless controller until it’s detected.
By following these steps, you’ll be able to expertly navigate your Switch games using wireless controllers.

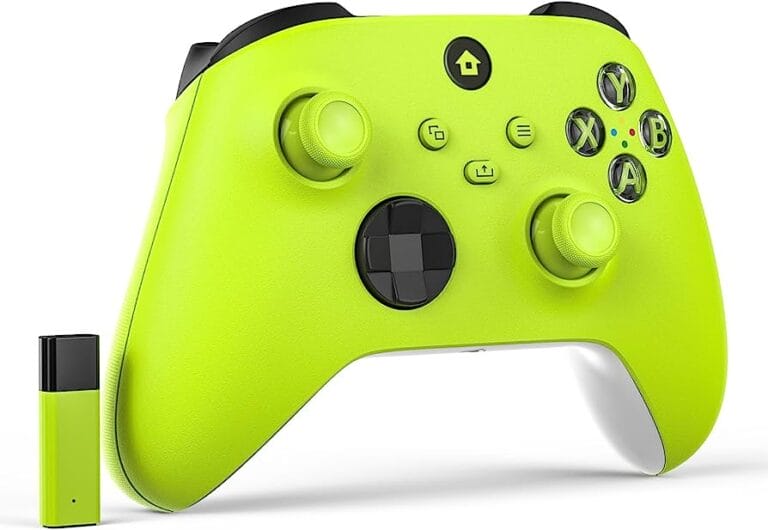
Gaming Control: Navigating Switch Wireless Controllers
Wireless controllers have revolutionized the gaming experience, providing gamers with the freedom and flexibility to play their favorite games without being tethered to a console.
The Nintendo Switch, with its innovative Joy-Con controllers, takes wireless gaming to a whole new level. In this article, we will explore the ins and outs of navigating the Switch wireless controllers, from pairing them to your console to making the most of their unique features.
Getting Started: Pairing Your Switch Wireless Controllers
Before you can dive into gaming with your Switch wireless controllers, it’s important to pair them with your console. The process is simple and straightforward. Here’s a step-by-step guide on how to do it:
- Make sure your Switch console is powered on and in handheld or docked mode.
- Locate the small sync button on the back of each Joy-Con controller.
- Press and hold the sync button on each Joy-Con controller until the lights on the controller start flashing.
- On your Switch console, navigate to the Home Menu and select “Controllers” from the options.
- Select “Change Grip/Order” and follow the on-screen instructions to connect your Joy-Con controllers.
- Once the Joy-Con controllers are successfully paired, the lights on the controllers will stop flashing and remain lit.
Now that your Switch wireless controllers are paired with your console, you’re ready to start gaming. But what about the unique features and functionalities of the Joy-Con controllers? Let’s explore them in more detail.
Exploring the Joy-Con Controllers: Features and Functionality
The Joy-Con controllers are packed with features that enhance the gaming experience on the Nintendo Switch. Here are some of the key features and functionalities to take advantage of:
Motion Controls:
One of the standout features of the Joy-Con controllers is their motion controls. These allow for precise and intuitive gameplay, whether you’re swinging a virtual tennis racket or steering a race car. The built-in gyroscopes and accelerometers in the Joy-Con controllers track your movements, translating them into in-game actions.
For example, in games like “Mario Kart 8 Deluxe,” you can use the motion controls to steer your kart by tilting the Joy-Con controllers left or right. The sensitivity of the motion controls can be adjusted to suit your preferences, making for a truly immersive gaming experience.
Additionally, the Joy-Con controllers have an infrared (IR) camera that can detect objects and shapes in certain games. This opens up a whole new world of interactive gameplay possibilities.
HD Rumble:
Another standout feature of the Joy-Con controllers is their HD rumble technology. This provides enhanced haptic feedback, simulating realistic vibrations and sensations during gameplay. Whether it’s the subtle rumble of driving over rough terrain or the intense shake of an explosion, the HD rumble adds an extra layer of immersion to your gaming experience.
The intensity and duration of the rumble can vary based on the in-game events, enhancing the overall sense of realism. It’s a small but impactful feature that adds to the joy of gaming on the Nintendo Switch.
Multiplayer Capabilities:
The Nintendo Switch is all about multiplayer gaming, and the Joy-Con controllers are designed to facilitate seamless multiplayer experiences. Each Joy-Con controller can be used independently as a standalone controller, allowing two players to enjoy multiplayer games right out of the box.
Alternatively, you can attach the Joy-Con controllers to the Joy-Con Grip, which combines them into a more traditional controller layout. This is perfect for games that require more precise controls or for players who prefer the feel of a traditional controller.
In addition to local multiplayer, the Nintendo Switch also supports online multiplayer, allowing you to connect and play with friends from around the world. With the Joy-Con controllers, you can enjoy multiplayer gaming in any setting, whether it’s on the go or in the comfort of your own home.
Customization Options:
To suit your gaming style and preferences, the Joy-Con controllers offer various customization options. You can adjust the sensitivity of the motion controls, calibrate the HD rumble, and even change the button mapping to better suit your playstyle.
Furthermore, Nintendo offers a range of different Joy-Con color options, allowing you to personalize your gaming setup. Whether you prefer the classic gray controllers or the vibrant neon colors, there’s a style to suit every taste.
Additionally, you can accessorize your Joy-Con controllers with various accessories, such as protective cases, charging docks, and controller grips.
These accessories not only enhance the comfort and durability of the controllers but also add a touch of style to your gaming setup.
Optimizing Your Gaming Experience: Tips and Tricks
Now that you’re familiar with the basics of navigating the Switch wireless controllers and the unique features of the Joy-Con controllers, let’s dive into some tips and tricks to optimize your gaming experience:
1. Keep Your Controllers Charged:
To ensure uninterrupted gaming sessions, make sure to keep your Joy-Con controllers charged. You can charge them by attaching them to the Switch console while it’s docked, using a Joy-Con charging grip, or using a charging dock specifically designed for the Joy-Con controllers.
It’s also a good idea to have spare Joy-Con controllers or a Pro Controller on hand, so you can continue gaming while your controllers are charging.
2. Adjust Motion Control Sensitivity:
If you find that the motion controls are too sensitive or not sensitive enough for your liking, you can adjust the sensitivity in the system settings of your Switch console. Experiment with different sensitivity levels to find the one that suits your playing style and preferences.
3. Take Advantage of HD Rumble:
Pay attention to the subtle vibrations and sensations produced by the HD rumble. It can provide important cues and feedback during gameplay, helping you immerse yourself in the game world. Use the HD rumble to your advantage, whether it’s to detect hidden objects or to time your actions more accurately.
4. Explore Different Control Options:
Don’t limit yourself to a single control option. Experiment with different setups, such as using a single Joy-Con controller, splitting the Joy-Con controllers between your hands, or using a Pro Controller.
Different games may benefit from different control options, so feel free to mix it up and find what works best for you.
5. Stay Up to Date:
Keep an eye out for firmware updates for your Switch console and Joy-Con controllers. These updates may introduce new features, improve performance, or address any issues. By keeping your system up to date, you can ensure you’re getting the best possible gaming experience.
By following these tips and exploring the unique features of the Joy-Con controllers, you’ll be able to navigate the world of Switch wireless gaming with confidence and maximize your enjoyment of the Nintendo Switch console. So grab those controllers, start pairing, and get ready for an incredible gaming experience!
Frequently Asked Questions
Welcome to our frequently asked questions page on navigating Switch wireless controllers. If you’re a gaming enthusiast, these questions and answers will provide you with valuable guidance on how to tackle the controls and enhance your gaming experience. Read on to level up your gaming skills!
1. How do I connect my Switch wireless controller to the console?
To connect your Switch wireless controller to the console, start by ensuring that your console is turned on and in the main menu. On the controller, press the small round “Sync” button located near the top.
Then, on the console, go to the “System Settings” menu, select “Controllers and Sensors,” and choose “Change Grip/Order.” Hold down the controller’s “Sync” button until the lights start flashing. Once the controller appears on the console screen, you can confirm the connection by pressing any button on the controller.
Note: If you’re connecting multiple controllers, follow the same process for each one, pressing the “Sync” button on each controller separately.
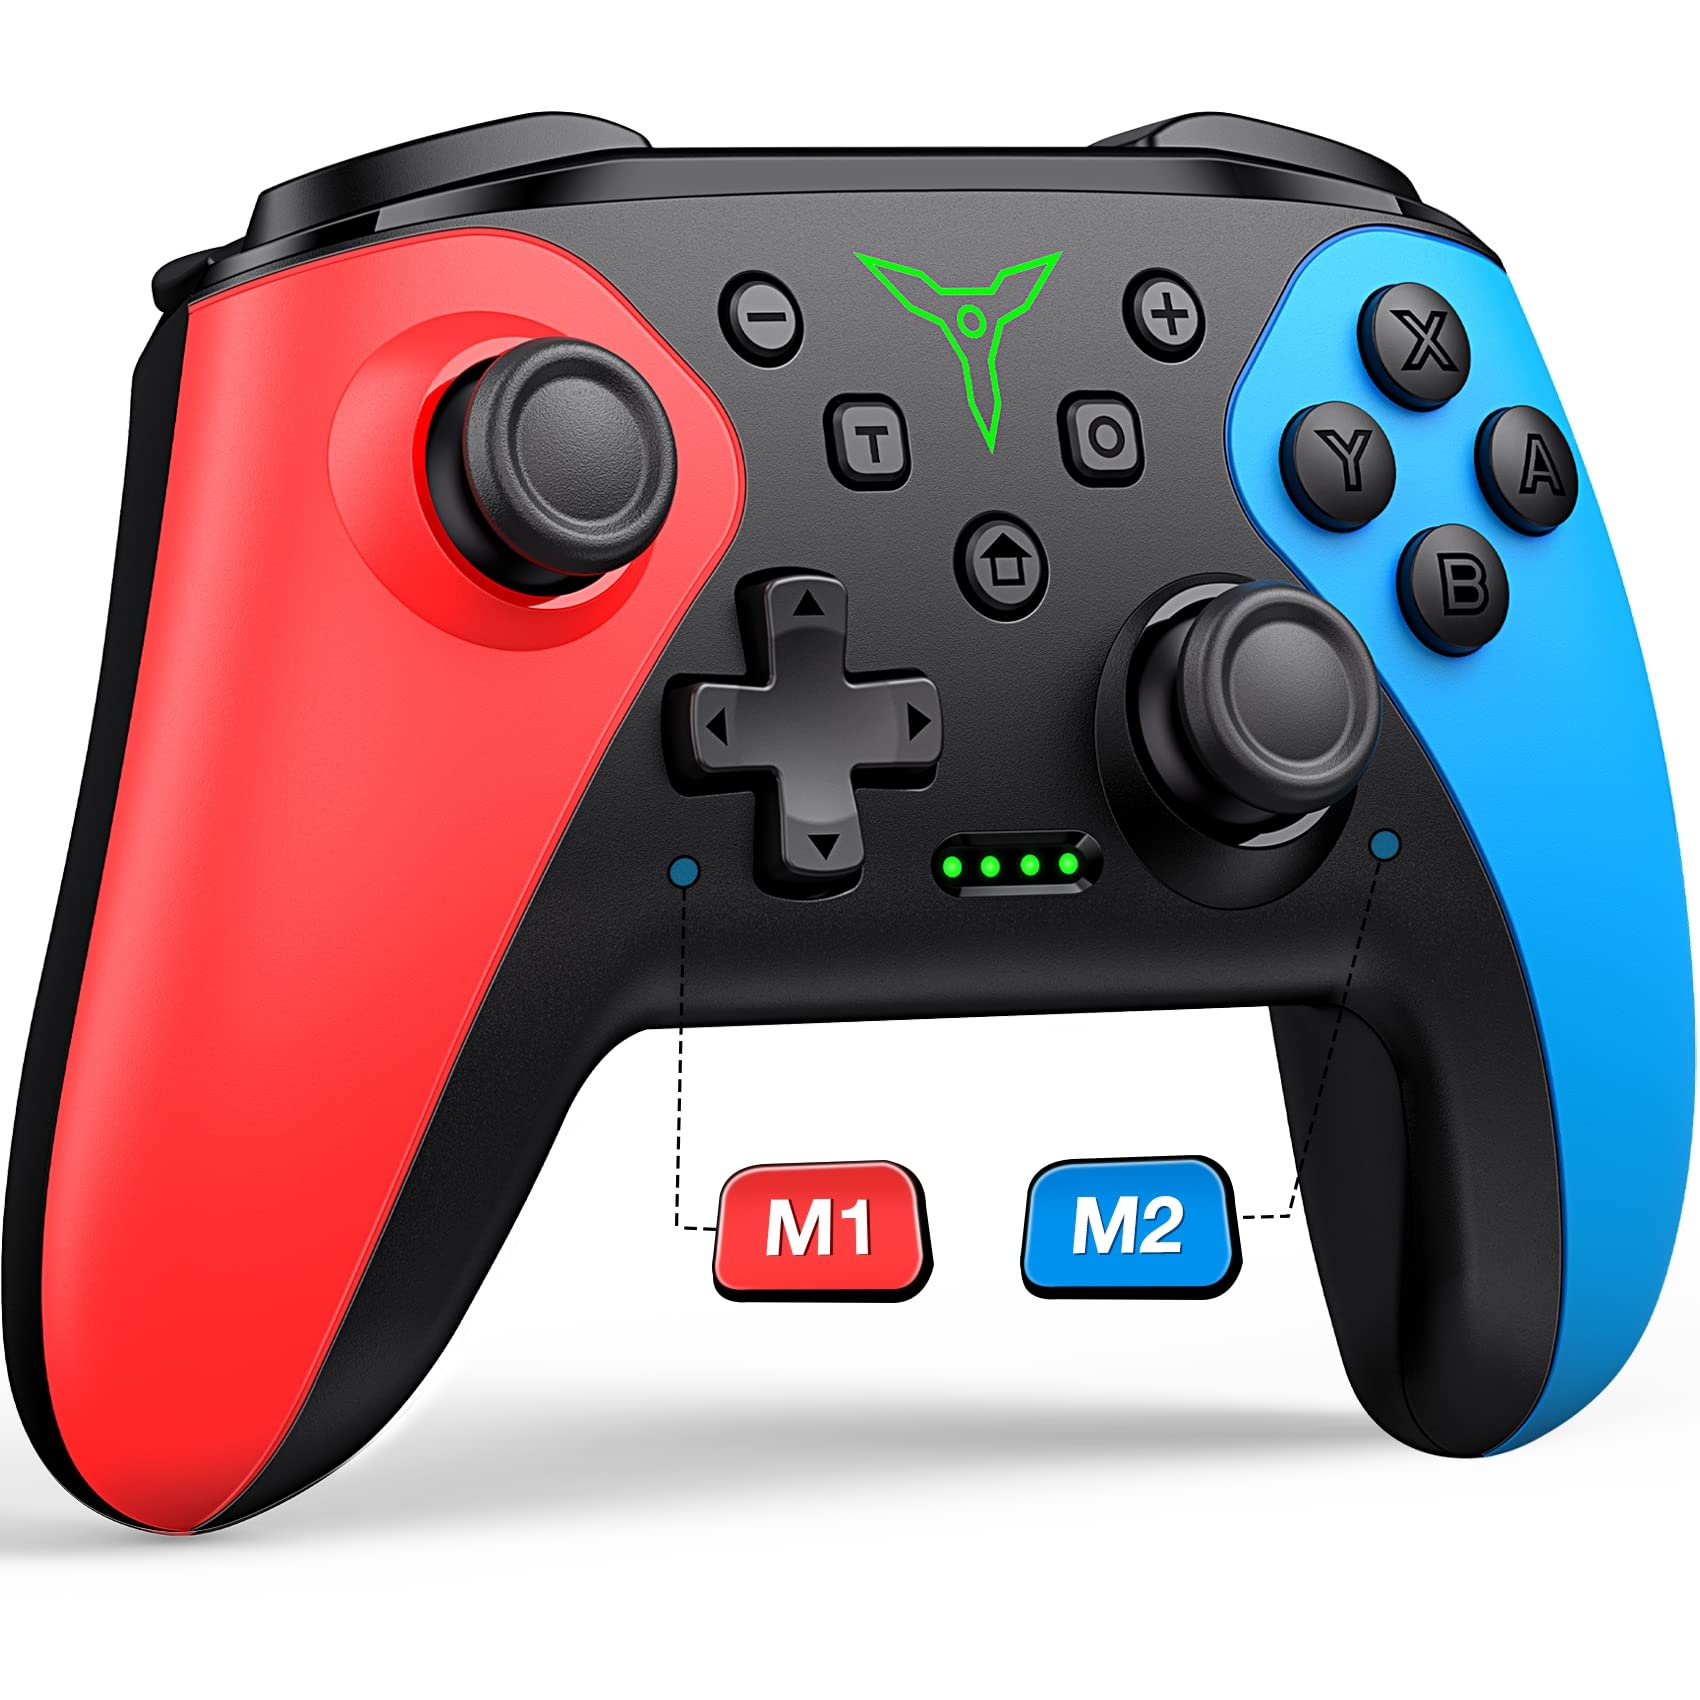
2. What is the purpose of the different buttons and controls on the Switch wireless controller?
The Switch wireless controller features various buttons and controls that serve different purposes to enhance your gaming experience. Here are some of the essential controls:
– Analog sticks: These allow you to control the movement of characters or objects in the game.
– Action buttons: Labeled A, B, X, and Y, these buttons are used for actions such as jumping, attacking, interacting, etc.
– D-pad: The directional pad helps navigate menus and in-game options.
– Shoulder buttons and triggers: These provide additional input options and can be programmed for specific actions in games.
– Home button: Pressing the home button takes you to the console’s main menu.
Learning about the functions of each control will help you navigate games more effectively and enjoy a seamless gaming experience.
3. How can I customize the settings of my Switch wireless controller?
To customize the settings of your Switch wireless controller, go to the “System Settings” menu on your console. From there, select “Controllers and Sensors,” and choose “Change Button Mapping” to customize the button assignments.
This allows you to remap the buttons to your liking, making it more comfortable and convenient for your gaming style. You can also adjust other settings, such as controller vibration, motion controls, and more. Experiment with different settings to find your ideal configuration for an optimal gaming experience.
Additionally, some games offer in-game customization options, allowing you to further personalize the controls according to your preferences. Check out the settings menu within each game to explore additional customizations.
4. Can I use a Switch wireless controller with other devices?
While designed primarily for use with the Nintendo Switch console, the Switch wireless controller can also be used with other devices. Compatible devices include PCs, certain smartphones, and tablets that support Bluetooth connectivity.
To connect your controller to a compatible device other than the Switch console, put your controller in pairing mode by pressing and holding the small round “Sync” button until the lights start flashing. Then, on the other device, enable Bluetooth, search for available devices, and select the controller from the list.
However, please note that certain features and functionality may be limited when using the controller with devices other than the Switch console. It’s always a good idea to check the device’s compatibility and consult the manufacturer’s instructions for more details.
5. How can I ensure the battery life of my Switch wireless controller lasts as long as possible?
To maximize the battery life of your Switch wireless controller, try the following tips:
– Adjust the controller’s brightness settings to a comfortable level without draining excessive power.
– When not in use, power off the controller or put it in sleep mode to conserve battery.
– Avoid using the controller’s vibration feature excessively, as it consumes more power.
– Keep the controller charged regularly by connecting it to the console or using a compatible charging accessory.
– If the battery life is significantly reduced over time, consider replacing the battery or contacting the manufacturer for assistance.
By following these suggestions, you can extend the battery life of your Switch wireless controller and enjoy uninterrupted gaming sessions.
So, here’s what you need to know about navigating switch wireless controllers. First, make sure your controller is charged and paired with your device.
Then, use the controller’s buttons and joysticks to move around and control your character in the game. Remember to customize your controller settings to your preferences for a better gaming experience.
And if you encounter any issues, try troubleshooting by resetting the controller or checking for software updates. With these steps, you’ll be ready to enjoy your gaming session with ease!