Say goodbye to tangled cables and hello to wireless convenience! Follow these simple steps to make your printer wireless:
- Check if your printer has built-in Wi-Fi capability.
- If not, purchase a Wi-Fi adapter that is compatible with your printer model.
- Connect the Wi-Fi adapter to your printer and ensure it is properly installed.
- Connect your printer to your Wi-Fi network using the printer's control panel or software.
- Test your wireless connection by printing a document from a device connected to the same Wi-Fi network.
 **
**How to Make Your Printer Wireless: A Step-by-Step Guide
** In today's modern world, wireless connectivity is a necessity. It provides convenience and flexibility in various aspects of our lives, including printing. If you're tired of dealing with tangled cables and limited accessibility, it's time to make your printer wireless. In this article, we will guide you through the process of transforming your printer into a wireless device. Say goodbye to the hassle of connecting your computer to your printer and enjoy the freedom of wireless printing. **Understanding Wireless Printing: What You Need to Know
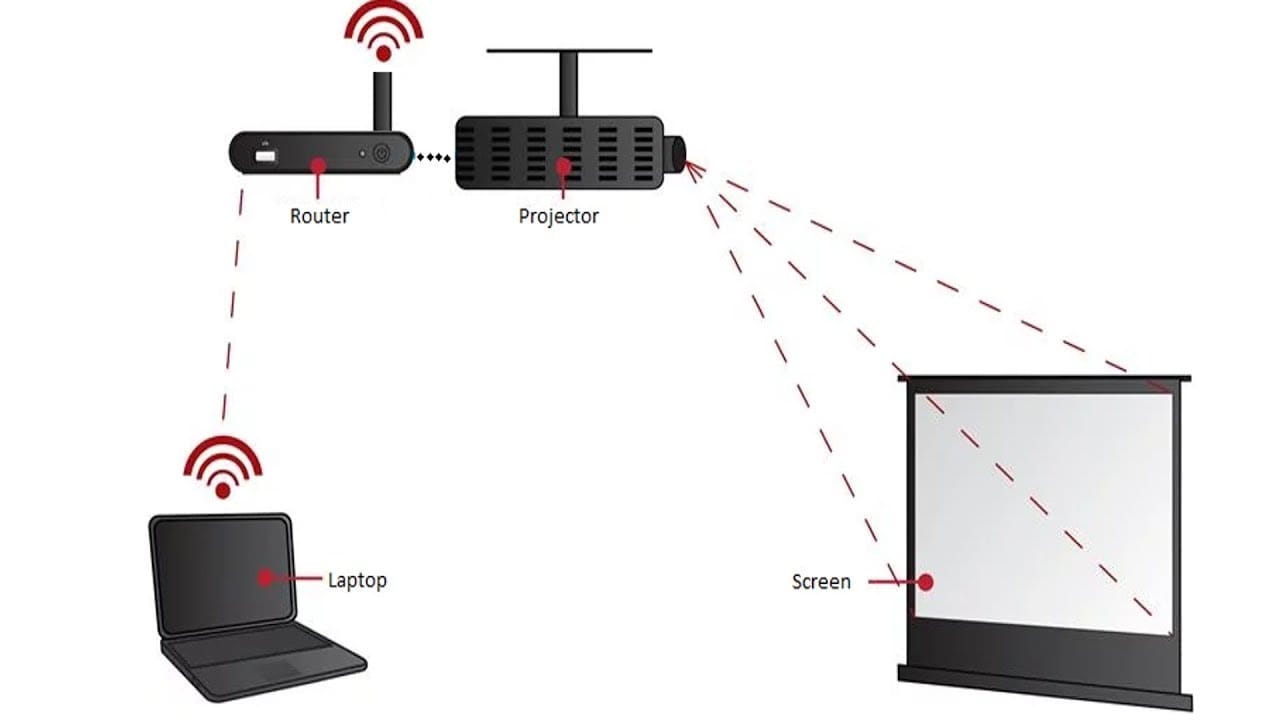
** Before diving into the steps of making your printer wireless, it's essential to understand the basics of wireless printing. Wireless printing utilizes Wi-Fi technology to establish a connection between your computer or mobile device and the printer. This connection allows you to send print jobs wirelessly to your printer, eliminating the need for physical cables. To achieve wireless printing, you need two crucial components: a wireless-enabled printer and a wireless network. A wireless-enabled printer has built-in Wi-Fi capability, allowing it to connect to your home or office network wirelessly. On the other hand, a wireless network provides the infrastructure for devices to communicate with each other without the use of cables. **The Benefits of Wireless Printing
** Wireless printing offers several advantages over traditional wired printing. Firstly, it allows you to print from anywhere within the range of your wireless network. You no longer need to be in the same room as your printer to send print jobs. This convenience is particularly useful in office settings or shared printer environments. Secondly, wireless printing eliminates the need for physical connections between your computer and the printer. This means no more tripping over cables or dealing with cluttered workspaces. Additionally, wireless printing enables multiple devices to connect to a single printer, promoting collaboration and efficiency. **Step 1: Check if Your Printer Supports Wireless Connectivity
** The first step in making your printer wireless is to determine if your printer already has built-in wireless capabilities. Most modern printers offer wireless connectivity as a standard feature, but older models may not have this functionality. To check if your printer supports wireless connectivity, consult the printer's user manual or visit the manufacturer's website for specifications. If your printer does not have built-in wireless capabilities, don't worry. There are alternative solutions available to make your printer wireless, which we will explore in the following steps. **Looking for Wireless Compatibility
** To identify if your printer is wireless-compatible, check for features such as "Wi-Fi," "Wireless," or "Network" in the printer's specifications. You can find this information in the user manual, on the printer itself, or on the manufacturer's website. If your printer is indeed wireless-compatible, you can proceed to the next steps. If not, don't worry – there are still ways to make your printer wireless. **Step 2: Connecting Your Wireless Printer to the Network
** If your printer is wireless-enabled, the next step is to connect it to your wireless network. This process may vary depending on the printer model, but the general steps remain the same. 1. Start by turning on your printer and accessing the printer's settings menu. 2. Look for the "Wi-Fi" or "Network" option in the settings and select it. 3. Your printer will search for available wireless networks. Choose your network from the list of options. 4. If your network is password-protected, you will be prompted to enter the network password. Follow the on-screen instructions to complete the connection process. 5. Once connected, your printer will be assigned an IP address on the network. **Troubleshooting Network Connectivity
** If you encounter any difficulties connecting your printer to the network, ensure that your wireless network is functioning correctly. Check your router and ensure that it is powered on and transmitting a wireless signal. If you continue to experience issues, consult your printer's user manual or contact the manufacturer's customer support for further assistance. **Step 3: Installing Printer Drivers and Software
** After successfully connecting your wireless printer to the network, the next step is to install the necessary printer drivers and software on your computer or mobile device. Printer drivers are software applications that enable communication between your device and the printer. Without the correct drivers, your computer will not be able to communicate with the printer, rendering wireless printing impossible. Most printers come with an installation CD that contains the required drivers and software. However, you can also download the latest drivers and software from the printer manufacturer's website. Visit the manufacturer's website, locate the support or downloads section, and search for your specific printer model. Download and install the drivers and software compatible with your operating system. **Benefits of Up-to-Date Printer Drivers
** Installing the latest printer drivers and software ensures optimal performance and compatibility between your device and the printer. Newer drivers often include bug fixes, performance improvements, and additional features. Regularly updating your printer drivers will ensure that you can take advantage of the latest advancements in wireless printing technology. **Step 4: Testing and Troubleshooting
** After successfully installing the printer drivers and software, it's time to test your wireless printing setup. Open a document or image on your device and select the print option. Choose your wireless printer from the list of available printers, configure your desired print settings, and hit the print button. If everything is set up correctly, your document should be printed wirelessly. If you encounter any issues during the test print, ensure that your device is connected to the same wireless network as your printer. Double-check the printer's settings and your device's network connection. If problems persist, consult the printer's user manual or contact the manufacturer's customer support for further assistance. **Tips for Troubleshooting Wireless Printing Issues
** - Ensure that both your device and printer are connected to the same wireless network. - Restart your device, printer, and wireless router to refresh the connections. - Check for any software updates for your device and printer. - Disable any firewall or antivirus software that may be interfering with the wireless connection. - Consider temporarily disconnecting and reconnecting your printer to the network to establish a new connection. **Next-Level Wireless Printing: Advanced Tips and Tricks
** Congratulations, you have successfully made your printer wireless! However, there are additional features and tips that can enhance your wireless printing experience. In this section, we will explore some advanced tips and tricks to take your wireless printing to the next level. **Tip 1: Mobile Printing
** Mobile printing allows you to print directly from your smartphone or tablet without the need for a computer. Many printer manufacturers provide dedicated mobile printing apps that enable seamless printing from your mobile device. These apps usually allow you to print various file types, including photos, documents, and web pages. To use mobile printing, ensure that your printer and mobile device are connected to the same wireless network. Install the mobile printing app provided by the printer manufacturer on your device. Open the app, select the desired file to print, configure your print settings, and send the print job wirelessly to your printer. **The Convenience of Mobile Printing
** Mobile printing offers unparalleled convenience, allowing you to print important documents or memorable photos directly from your smartphone or tablet. Whether you're on the go or lounging at home, mobile printing ensures that you can bring your digital files to life in a matter of seconds. **Tip 2: Cloud Printing
** Cloud printing takes wireless printing one step further by allowing you to print documents from any location, even if you're not connected to the same network as your printer. With cloud printing, you can print files from your device to a cloud-based service, which then sends the print job to your printer. To use cloud printing, you need to set up a compatible cloud printing service and link it to your printer. Some popular cloud printing services include Google Cloud Print, HP ePrint, and Epson Connect. These services typically require you to create an account and register your printer. Once set up, you can access your cloud printing service from any device with internet connectivity and send print jobs to your printer remotely. **The Flexibility of Cloud Printing
** Cloud printing provides the ultimate flexibility in wireless printing. Whether you're in a different country or simply don't have access to your printer's network, cloud printing allows you to print documents with ease. This feature is particularly useful for professionals who frequently travel or individuals who prefer to work remotely. **Tip 3: Printer Sharing
** Wireless printing enables you to share a single printer among multiple devices within your home or office network. Printer sharing allows everyone in the network to send print jobs to the shared printer wirelessly. This eliminates the need for each person to have their own dedicated printer and promotes cost-efficiency and convenience. To set up printer sharing, ensure that your printer is connected to the network, and all the devices you want to share the printer with are also connected to the same network. Access the printer's sharing settings, usually found in the printer's control panel or configuration interface. Enable printer sharing and adjust the necessary settings, such as permissions and access control, to ensure smooth operation. **The Advantages of Printer Sharing
** Printer sharing fosters collaboration and convenience within a shared workspace. Instead of having separate printers for each individual, one printer can serve multiple users. This reduces expenses, saves space, and promotes a greener environment by reducing electronic waste. **Embrace Wireless Printing and Enjoy Freedom and Convenience
** Making your printer wireless opens up a world of freedom and convenience. No longer restricted by physical cables, you can print from anywhere within your home or office network. Whether you're a student, professional, or tech-savvy individual, wireless printing is a valuable addition to your setup. By following the step-by-step guide outlined in this article, you can transform your printer into a wireless device effortlessly. Enjoy the benefits of wireless printing, including easy connectivity, clutter-free workspaces, and the ability to print from multiple devices. Embrace the wireless revolution and take full advantage of this modern technology. Say goodbye to tangled cables and hello to wireless convenience.Key Takeaways: How to Make Printer Wireless?
- Check if your printer supports Wi-Fi connectivity.
- Connect your printer to a Wi-Fi network using the printer's control panel.
- Install the printer software on your computer and choose the wireless connection option.
- Ensure that both the printer and the computer are on the same Wi-Fi network.
- Test the wireless connection by printing a document wirelessly.
Frequently Asked Questions
In this section, we will answer some common questions related to making a printer wireless.
1. Can I make any printer wireless?
In most cases, you can make any printer wireless with the right equipment and setup. Wireless printing requires a Wi-Fi or Bluetooth connection, so if your printer has USB or Ethernet ports, you can use a wireless print server to make it compatible with your wireless network. However, some older or more basic printers may not have this capability.
To make your printer wireless, you'll need to connect it to your Wi-Fi network or pair it with a Bluetooth-enabled device. This typically involves accessing the printer's settings or control panel, selecting the wireless network you want to connect to, and entering the network password. Refer to your printer's user manual or the manufacturer's website for specific instructions on how to make your printer wireless.
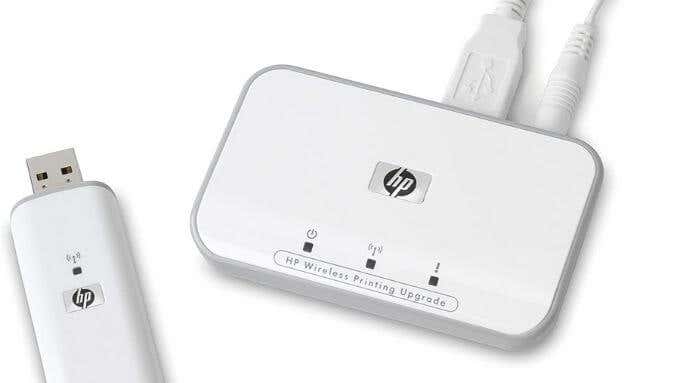
2. What is a wireless print server?
A wireless print server is a device that allows you to connect a non-wireless printer to a wireless network. It acts as a bridge between your printer and your Wi-Fi network, enabling wireless communication between them. The print server typically connects to the printer via a USB or Ethernet port, and it connects to your Wi-Fi network wirelessly.
By using a wireless print server, you can make your non-wireless printer accessible to multiple devices on your network without the need for direct physical connections. This means you can print wirelessly from your laptop, smartphone, or any other device connected to the same Wi-Fi network as the print server.
3. What are the benefits of making a printer wireless?
Making your printer wireless offers several advantages. Firstly, it eliminates the need for physical connections between your devices and the printer, reducing cable clutter and making it convenient to print from anywhere within the range of your Wi-Fi network. You can print from your laptop in the living room, your smartphone in the bedroom, or any other device in your home or office.
Additionally, wireless printing allows for easier sharing of the printer among multiple users. If you have multiple devices connected to the same Wi-Fi network, they can all access the printer without the need to physically connect to it. This is particularly useful in a home or office environment where multiple people need to print from different devices.
4. Can I still print if my Wi-Fi network goes down?
If your Wi-Fi network goes down, you may not be able to print wirelessly. However, there are a few workarounds. Some modern printers offer features like Wi-Fi Direct or Bluetooth, which allow you to connect and print directly from your device without the need for a Wi-Fi network.
Alternatively, you can connect your device directly to the printer using a USB cable if it has a USB port. This will enable you to print even if your Wi-Fi network is unavailable. Remember to check your printer's manual or consult the manufacturer's website for specific instructions on alternative printing methods.
5. How can I troubleshoot wireless printing issues?
If you experience any issues with wireless printing, here are a few troubleshooting steps you can try:
1. Ensure that your printer is properly connected to your Wi-Fi network or Bluetooth device. 2. Check that your Wi-Fi network signal is strong and stable. 3. Restart your printer and the device you are trying to print from. 4. Update the printer's firmware and drivers to the latest version. 5. Verify that no firewall or antivirus software is blocking the printer's communication. 6. Double-check the printer settings and make sure it is set as the default printer on your device. 7. If possible, test the printer with another device to determine if the issue is device-specific or printer-related. 8. Consult the printer's user manual or contact the manufacturer's support for further assistance.