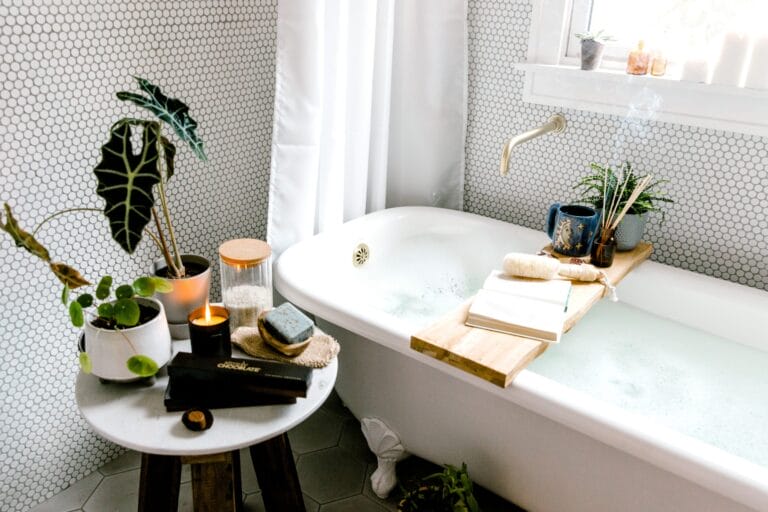
Looking to learn how to install a bathtub? You’ve come to the right place! In this step-by-step guide, we’ll walk you through the process of installing a bathtub in your bathroom. It may sound like a daunting task, but with a little know-how and some handy tools, you can tackle this project like a pro.
Now, you might be wondering why you should install a bathtub yourself instead of hiring a professional. Well, not only will it save you money, but it can also be a rewarding and satisfying DIY project. Plus, you’ll have the satisfaction of knowing that you did it all on your own. So, let’s get started on this bathtub installation adventure!
In the following paragraphs, we’ll cover everything you need to know, from choosing the right bathtub for your space to preparing the area, and finally, the actual installation process. So, grab your tool belt and let’s dive into the world of bathtub installation!
- Measure the available space and choose the right size bathtub.
- Prepare the area by removing old fixtures and repairing any damage.

How to Install a Bathtub: A Step-by-Step Guide
Installing a bathtub may seem like a daunting task, but with the right tools and a little know-how, you can do it yourself. Whether you’re replacing an old bathtub or installing a new one, this comprehensive guide will walk you through the process step-by-step. From preparing the space to connecting the plumbing, we’ve got you covered. So, roll up your sleeves and let’s get started!
1. Measure and Prepare the Space
The first step in installing a bathtub is to measure and prepare the space. Start by measuring the length, width, and height of the area where the bathtub will be placed. This will help you choose the right-sized tub and ensure a proper fit. Next, remove any existing fixtures or obstacles in the area, such as old tiles or a previous bathtub. Clean the space thoroughly and make any necessary repairs, such as fixing damaged flooring or walls. Finally, ensure that the plumbing and electrical connections are in good condition and meet local building codes.
Once the space is prepared, you’ll need to install a bathtub platform or support system if required. This will provide a stable base for the bathtub and help distribute its weight evenly. Follow the manufacturer’s instructions carefully and use the appropriate materials for the job. Remember to check for any plumbing or electrical lines that may be running through the area and make any necessary accommodations.
Before proceeding, it’s essential to have a solid plan in place. Consider the layout of the bathroom and how the bathtub will fit into the overall design. Take into account factors such as the location of the plumbing lines and the position of the drain. Creating a detailed plan will help you stay organized and ensure a smooth installation process.
2. Install the Bathtub Surround
The next step in installing a bathtub is to assemble and install the bathtub surround. The surround is the walls and enclosure that go around the bathtub, creating a seamless and waterproof barrier. Start by dry-fitting the surround pieces to ensure a proper fit. If necessary, trim the pieces to size using a saw or utility knife.
Once the pieces are cut to size, begin installing them according to the manufacturer’s instructions. Apply adhesive or caulk to the back of each piece and press them firmly against the wall, ensuring proper alignment. Use a level to check that the surround is plumb and adjust as needed. Secure the surround with screws or nails, being careful not to damage the bathtub or surrounding walls.
After the surround is installed, apply a waterproof sealant along the seams to prevent any water from seeping behind the walls. This will help protect against mold and water damage. Allow the sealant to dry completely before moving on to the next step.
3. Connect the Drain and Overflow
With the bathtub surround in place, it’s time to connect the drain and overflow. Start by assembling the drain components according to the manufacturer’s instructions. This typically involves attaching a drain shoe and gasket to the underside of the bathtub and connecting it to the drainpipe.
Next, attach the overflow assembly to the bathtub. This is the mechanism that prevents the bathtub from overflowing when it’s filled with water. Secure the overflow plate to the bathtub using screws and connect it to the overflow pipe.
Before attaching the drain and overflow to the plumbing, apply plumber’s putty or silicone sealant to create a watertight seal. Carefully lower the bathtub onto the platform or support system, ensuring that the drain and overflow align with the plumbing lines. Connect the drainpipe and overflow pipe to the respective plumbing connections, making sure to tighten all the fittings securely.
4. Install the Faucet and Fixtures
With the drain and overflow connected, it’s time to install the faucet and fixtures. Start by determining the desired location for the faucet and fixtures based on your bathroom layout. Mark the positions on the bathtub’s rim and drill holes using the appropriate-sized drill bit.
Once the holes are drilled, insert the faucet and fixture components into the holes and secure them tightly. Apply a bead of silicone sealant around the base of each component to create a watertight seal. Connect the water supply lines to the faucet and fixtures, ensuring that the hot and cold lines are correctly connected. Turn on the water supply to check for any leaks and make any necessary adjustments.
Finally, install any additional fixtures, such as a handheld showerhead or a tub spout. These can be attached to the existing water supply lines or connected to a separate valve or diverter. Follow the manufacturer’s instructions carefully and test the fixtures to ensure they are functioning properly.
5. Finish the Surround and Test for Leaks
The final step in installing a bathtub is to finish the surround and test for leaks. Start by applying a waterproof sealant or caulk along the edges of the bathtub and surround. This will help ensure a watertight seal and prevent any water from seeping behind the walls.
Next, install any finishing touches, such as trim or molding, to give the bathtub a polished and cohesive look. Paint or tile the surrounding walls as desired to complete the overall aesthetic of the bathroom.
Once the installation is complete, it’s crucial to test the bathtub for leaks. Fill the tub with water and let it sit for a few hours. Check for any signs of water dripping or pooling around the drain and fixtures. If you notice any leaks, tighten the fittings or apply additional sealant as needed. Once the bathtub passes the leak test, you can confidently enjoy your newly installed bathtub!
Additional Considerations for Installing a Bathtub
Installing a bathtub requires careful planning and attention to detail. Here are a few additional considerations to keep in mind:
1. Hiring a Professional
If you’re not confident in your DIY skills or if the installation involves complex plumbing or electrical work, it’s advisable to hire a professional. They have the expertise and experience to ensure a safe and efficient installation.
2. Choosing the Right Bathtub
There are various types of bathtubs available, including freestanding, drop-in, and alcove models. Consider the style, size, and material of the bathtub to find the one that best suits your needs and preferences.
3. Accessibility Features
If you or someone in your household has mobility issues, consider installing a bathtub with accessibility features such as grab bars or a walk-in tub. These additions can enhance safety and make bathing easier for individuals with limited mobility.
4. Proper Ventilation
Bathrooms are prone to excess moisture, which can lead to mold and mildew growth. Ensure proper ventilation by installing an exhaust fan or opening windows during and after bathing to prevent water damage and maintain a healthy environment.
5. Maintenance and Cleaning
Regular maintenance and cleaning are necessary to keep your bathtub in good condition. Follow the manufacturer’s guidelines for cleaning and avoid using abrasive materials or harsh chemicals that could damage the finish.
6. Local Building Codes
Before starting any installation or remodeling project, familiarize yourself with the local building codes and obtain any necessary permits. This will ensure that your installation meets safety regulations and prevent any potential issues in the future.
By following these guidelines and considering these additional factors, you can successfully install a bathtub that is not only functional but also enhances the beauty and comfort of your bathroom space. So, dive in and enjoy the luxury of a relaxing soak in your own home!
Key Takeaways: How to Install a Bathtub
- Choose a suitable bathtub that fits your bathroom space and needs.
- Prepare the bathroom area by removing old fixtures and ensuring a clean and level surface.
- Install the drain and overflow system, following the manufacturer’s instructions.
- Position the bathtub in the desired location, ensuring proper alignment and support.
- Connect the plumbing and secure the bathtub in place, ensuring all connections are tight and leak-free.
Frequently Asked Questions
Welcome to our guide on installing a bathtub! Below, you’ll find answers to some common questions to help you with your installation project.
1. What tools and materials do I need to install a bathtub?
Before getting started, gather the following tools and materials: a bathtub, a level, a tape measure, a hacksaw, a silicone caulk gun, a pipe wrench, a screwdriver, plumbing fittings, a drill, a jigsaw, and safety equipment such as gloves and goggles. Additionally, make sure you have access to the appropriate plumbing and electrical connections.
It’s important to note that specific installations may require additional tools or materials, so be sure to consult the manufacturer’s instructions for your specific bathtub model.
2. How do I prepare the bathroom before installing a bathtub?
Prior to installing your bathtub, take the following steps to prepare your bathroom:
First, ensure the floor is level and structurally sound. Remove any existing flooring or subflooring if necessary.
Next, check the plumbing and ensure that all pipes and connections are in good condition. If any repairs or replacements are needed, address them before proceeding with the installation.
3. What are the steps to install a bathtub?
The specific steps may vary depending on the type and model of the bathtub, but here is a general overview:
1. Measure and mark the area where the bathtub will be installed.
2. Rough-in the plumbing, including drain and water supply lines.
3. Install any necessary support framing and/or bathtub feet.
4. Position the bathtub in the designated area, ensuring it is level.
5. Connect the plumbing, including attaching the drain and water supply lines.
6. Seal the edges of the bathtub with silicone caulk.
7. Test the bathtub for any leaks or issues.
Remember to always consult the manufacturer’s instructions for your specific bathtub model to ensure proper installation.
4. Can I install a bathtub myself, or do I need to hire a professional?
While it is possible to install a bathtub yourself, it’s important to consider your level of experience and comfort with plumbing and construction projects. Installing a bathtub requires knowledge of plumbing connections and the ability to handle heavy materials.
If you are confident in your abilities and have the necessary tools and materials, you can attempt the installation yourself. However, if you are unsure or uncomfortable with the process, it is recommended to hire a professional plumber or contractor who specializes in bathtub installations. They can ensure the job is done correctly and safely.
5. How long does it usually take to install a bathtub?
The installation time for a bathtub can vary depending on factors such as the type of bathtub, the complexity of the installation, and the level of experience of the installer. On average, a bathtub installation may take anywhere from a few hours to a full day.
Factors that can impact installation time include the need for plumbing adjustments, any necessary structural modifications, and the time required for proper leveling and sealing. It’s important to allocate enough time for the installation to ensure it is done correctly without rushing the process.
Summary
Installing a bathtub may sound tricky, but it can be done with these simple steps:
First, gather all the tools and materials you’ll need, like a wrench and plumber’s putty. Then, shut off the water supply to the bathroom. Next, remove the old bathtub carefully, making sure to disconnect any plumbing connections. Once that’s done, clean the area thoroughly before installing the new bathtub. Attach the drain and overflow pipes, and secure them tightly. Finally, connect the water supply lines and test the bathtub for any leaks. With patience and care, you can have a new bathtub in no time!
Remember to always consult a professional if you’re unsure or need additional assistance. Happy installing!